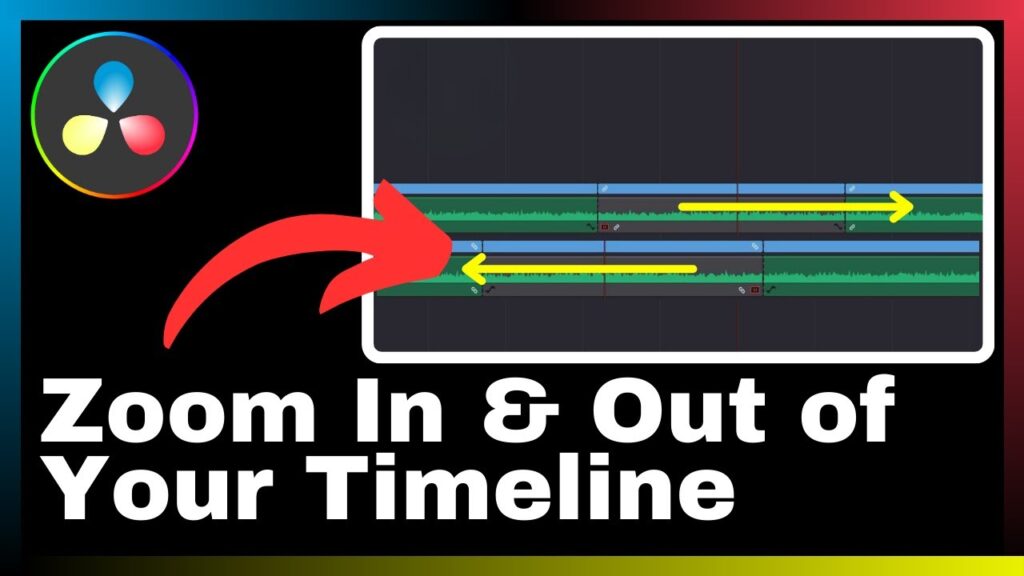
“How to Zoom In & Out of Your Timeline in DaVinci Resolve” is a detailed tutorial video presented by Media Magnet Guide. In this informative content, you will learn the essential techniques to effectively zoom in and out of the timeline within the powerful editing software, DaVinci Resolve. The video aims to provide you with the necessary skills for precise editing and seamless navigation, ensuring an enhanced editing experience. By following the instructions and tips shared in this tutorial, you will be able to maximize your editing capabilities and optimize your workflow in DaVinci Resolve.
DaVinci Resolve is an all-in-one software known for its advanced features in video editing, color correction, visual effects, and audio post-production. This versatile software caters to both professionals and beginners, offering a comprehensive set of tools suitable for projects of various sizes and complexities. With the clear guidance and expertise provided by Media Magnet Guide, you can easily master the zooming functionality in DaVinci Resolve, allowing you to enhance your overall editing efficiency and achieve desired results. Sit back, grab your notepad, and get ready to elevate your editing skills through this instructional tutorial.
Understanding DaVinci Resolve
DaVinci Resolve is a powerful and versatile video editing software that provides professionals and beginners with a comprehensive set of tools for editing, color correction, visual effects, and audio post-production. With its user-friendly interface and extensive features, it has become a popular choice for projects of all sizes and complexities. In this article, we will explore the various aspects of DaVinci Resolve, including its features, interface, and the specific topic of zooming in and out of the timeline for precise editing and navigation.
Overview of DaVinci Resolve
DaVinci Resolve is an all-in-one video editing software that offers a wide range of features that cater to the needs of both professionals and beginners. It provides an extensive toolkit for editing, color grading, visual effects, and audio post-production, making it a comprehensive solution for all aspects of video production. Whether you are working on a simple project or a complex one, DaVinci Resolve has the tools and capabilities to help you achieve your creative vision.
Features of DaVinci Resolve
DaVinci Resolve boasts a plethora of features that make it stand out among other video editing software. Some of its notable features include:
-
Non-linear editing: DaVinci Resolve allows you to work with multiple video and audio tracks simultaneously, making it easy to arrange and organize your footage.
-
Color grading: With its advanced color grading tools, DaVinci Resolve allows you to adjust the color, tone, and saturation of your footage to create the desired look and atmosphere.
-
Visual effects: DaVinci Resolve offers a wide range of visual effects capabilities, allowing you to enhance your footage with graphics, animations, and other visual elements.
-
Audio post-production: DaVinci Resolve provides powerful audio editing and mixing tools, allowing you to enhance the audio quality of your videos and create immersive soundscapes.
-
Collaboration: DaVinci Resolve offers features that facilitate collaboration among team members, allowing multiple users to work on the same project simultaneously.
These are just a few of the many features that DaVinci Resolve offers. Its extensive toolkit ensures that you have all the tools you need to bring your creative vision to life.
Interface of DaVinci Resolve
The interface of DaVinci Resolve is designed to be user-friendly and intuitive, making it easy for both professionals and beginners to navigate and use the software effectively. The interface is divided into various panels that house different tools and functions, allowing you to access them quickly and efficiently.
Some of the key panels in the DaVinci Resolve interface include:
-
Media Pool: The Media Pool panel allows you to import and organize your media files, including videos, images, and audio. You can browse through your files, preview them, and organize them into folders for easy access.
-
Edit Page: The Edit Page is where you will spend most of your time when working on your project. It provides a timeline view where you can arrange and edit your footage, add transitions, effects, and audio, and perform other editing tasks.
-
Color Page: The Color Page is where you can perform color grading and correction on your footage. It provides a comprehensive set of tools for adjusting the color, contrast, and saturation of your videos, allowing you to create the desired look and atmosphere.
-
Fusion Page: The Fusion Page is where you can add visual effects and motion graphics to your footage. It provides a node-based workflow that allows you to create complex effects and animations, making it a powerful tool for adding visual flair to your videos.
-
Fairlight Page: The Fairlight Page is dedicated to audio post-production. It provides a range of tools for editing and mixing audio, including EQ, compression, and noise reduction, allowing you to enhance the audio quality of your videos.
These are just a few of the key panels in the DaVinci Resolve interface. Each panel is designed to provide easy access to the tools and functions you need, ensuring a seamless editing experience.
Introduction to Timeline in DaVinci Resolve
The timeline is a crucial component of any video editing software, including DaVinci Resolve. It serves as a visual representation of your footage, allowing you to arrange and edit your videos, add effects and transitions, and perform other editing tasks. In this section, we will explore the various components of the timeline, how to work with it effectively, and the basics of the timeline panel.
Components of the Timeline
The timeline in DaVinci Resolve consists of several key components that help you navigate and edit your footage efficiently. These components include:
-
Clips: Clips are the individual pieces of footage that make up your project. Each clip represents a specific segment of your video or audio and can be arranged on the timeline to create your desired sequence.
-
Tracks: Tracks are the horizontal layers on the timeline where you can place your clips. Each track represents a different layer of footage or audio, allowing you to organize and separate different elements of your project.
-
Markers: Markers are visual indicators that you can place on the timeline to mark specific points of interest or to make notes. They can be used to flag important moments, denote specific edits, or indicate changes that need to be made.
-
Keyframes: Keyframes are used to create animations and transitions in your footage. They allow you to specify specific points in time where a property or effect should change, such as the position, scale, or opacity of a clip.
These components work together to provide a visual representation of your project and allow you to manipulate and edit your footage effectively.
Working with the Timeline
Working with the timeline in DaVinci Resolve involves a variety of tasks, including arranging clips, trimming footage, adding effects and transitions, and performing other editing tasks. Here are some key techniques for working with the timeline:
-
Arranging Clips: To arrange clips on the timeline, you can simply drag and drop them from the media pool onto the desired track. You can then use the various editing tools and functions to trim and position the clips as needed.
-
Trimming Footage: Trimming allows you to adjust the length of your clips, removing unwanted portions or adding additional frames. DaVinci Resolve provides various trimming tools and techniques, including ripple editing, slip editing, and slide editing, which allow you to fine-tune the timing and duration of your footage.
-
Adding Effects and Transitions: DaVinci Resolve offers a wide range of effects and transitions that you can apply to your clips. To add an effect or transition, simply drag and drop it onto the desired clip on the timeline. You can then customize the parameters and settings of the effect to achieve the desired result.
-
Keyframing: Keyframing allows you to create animations and transitions in your footage by specifying specific points in time where a property or effect should change. To add keyframes, you can use the keyframe controls in the timeline panel or directly manipulate the properties of the clip in the viewer.
These are just a few of the techniques you can use when working with the timeline in DaVinci Resolve. By mastering these techniques and exploring the various tools and functions available, you can achieve precise editing and navigation in your projects.
Timeline Panel Basics
The timeline panel in DaVinci Resolve provides a range of tools and functions that allow you to navigate and edit your footage effectively. Understanding the basics of the timeline panel is essential for efficient editing. Here are some key features of the timeline panel:
-
Zoom Slider: The zoom slider allows you to adjust the zoom level of the timeline, thereby controlling the level of detail that is displayed. By zooming in, you can focus on specific sections of your footage for precise editing, while zooming out allows you to have a broad overview of your project.
-
Time Ruler: The time ruler is a visual representation of the duration of your project. It provides markers that indicate specific points in time, such as seconds, frames, or timecode, allowing you to navigate and locate specific moments in your footage.
-
Scroll Bar: The scroll bar allows you to navigate horizontally through your footage, especially when the timeline spans a longer duration than the visible area. By dragging the scroll bar, you can move through your project and locate specific sections efficiently.
-
Track Controls: Each track on the timeline has its own set of controls that allow you to perform specific tasks, such as enabling or disabling audio, adjusting opacity, or applying effects. Familiarize yourself with these track controls to efficiently manage and edit your clips.
By understanding and utilizing these features of the timeline panel, you can enhance your editing workflow and achieve precision in your projects.
How to Access the Zoom Feature in DaVinci Resolve
The zoom feature in DaVinci Resolve allows you to adjust the zoom level of the timeline, enabling you to focus on specific sections of your footage for precise editing and navigation. In this section, we will explore how to access the zoom tool and understand its role in the timeline.
Locating the Zoom Tool
The zoom tool in DaVinci Resolve is located in the timeline panel, specifically in the form of a zoom slider. To access the zoom tool, follow these steps:
- Open DaVinci Resolve and load your project.
- Locate the timeline panel, typically situated at the bottom of the user interface.
- Look for the zoom slider, which is a horizontal slider bar with “+” and “-” symbols indicating zoom in and zoom out respectively.
Understanding the Role of the Zoom Tool in the Timeline
The zoom tool in DaVinci Resolve allows you to adjust the zoom level of the timeline, changing the level of detail that is displayed. By zooming in, you can magnify specific sections of your footage for precise editing and manipulation. Conversely, by zooming out, you can have a broader overview of your project, allowing you to navigate and work on larger sections of your timeline.
Adjusting the zoom level of the timeline is particularly useful when working on complex projects that require meticulous attention to detail or when dealing with footage that requires precise alignment or trimming. By utilizing the zoom tool effectively, you can enhance your editing workflow and achieve greater control over your footage.
Steps to Zoom In on Your DaVinci Resolve Timeline
Zooming in on your DaVinci Resolve timeline is a straightforward process that allows you to focus on specific sections of your footage for precise editing. In this section, we will explore two methods to zoom in on your timeline: using the zoom slider and utilizing shortcuts for zooming in.
Using the Zoom Slider
The zoom slider in DaVinci Resolve provides a simple way to adjust the zoom level of the timeline. To zoom in on your timeline using the zoom slider, follow these steps:
- Locate the zoom slider in the timeline panel, typically positioned around the bottom center of the user interface.
- Click and drag the slider to the right, towards the “+” symbol. As you drag the slider to the right, the zoom level of the timeline will increase, magnifying the displayed sections.
- Release the mouse button when you have achieved the desired level of zoom.
By using the zoom slider, you can easily and precisely adjust the zoom level of your timeline, allowing you to concentrate on specific areas of your footage.
Shortcuts for Zooming In
In addition to using the zoom slider, DaVinci Resolve provides keyboard shortcuts that enable you to quickly zoom in on your timeline. These shortcuts provide a more efficient and convenient way to adjust the zoom level. Here are some essential shortcuts for zooming in on your DaVinci Resolve timeline:
-
Ctrl + “=” (Windows) / Command + “=” (Mac): This shortcut allows you to zoom in incrementally on your timeline. Each press of the shortcut will increase the zoom level by a predefined amount.
-
Ctrl + “+” (Windows) / Command + “+” (Mac): This shortcut allows you to zoom in instantly on your timeline. Each press of the shortcut will zoom in by a significant amount, magnifying your footage for precise editing.
Utilizing these shortcuts will streamline your editing workflow and enable you to zoom in on your timeline quickly and effortlessly.
Understanding the Zoomed-In View
When you zoom in on your DaVinci Resolve timeline, the view becomes more detailed, allowing you to work on specific sections of your footage with greater precision. The increased level of zoom provides a closer look at your clips, enabling you to perform tasks such as trimming, aligning, or adding effects with increased accuracy.
In the zoomed-in view, you may also notice additional details, such as individual frames or more precise markers on the time ruler. These additional details further aid you in pinpointing specific moments in your footage and performing precise edits.
By utilizing the zoom function effectively, you can improve your editing workflow and achieve greater precision in your projects.
Steps to Zoom Out of Your DaVinci Resolve Timeline
Zooming out of your DaVinci Resolve timeline allows you to have a broader overview of your project, enabling you to navigate and work on larger sections of your footage. In this section, we will explore two methods to zoom out of your timeline: using the zoom slider and utilizing shortcuts for zooming out.
Using the Zoom Slider
To zoom out of your timeline using the zoom slider, follow these steps:
- Locate the zoom slider in the timeline panel, typically positioned around the bottom center of the user interface.
- Click and drag the slider to the left, towards the “-” symbol. As you drag the slider to the left, the zoom level of the timeline will decrease, providing a broader view of your project.
- Release the mouse button when you have achieved the desired level of zoom.
By using the zoom slider, you can conveniently adjust the zoom level of your timeline, allowing you to navigate and work on larger sections of your footage.
Shortcuts for Zooming Out
DaVinci Resolve provides keyboard shortcuts that enable you to quickly zoom out of your timeline. These shortcuts provide a more efficient and convenient way to adjust the zoom level. Here are some essential shortcuts for zooming out of your DaVinci Resolve timeline:
-
Ctrl + “-” (Windows) / Command + “-” (Mac): This shortcut allows you to zoom out incrementally on your timeline. Each press of the shortcut will decrease the zoom level by a predefined amount.
-
Ctrl + “” (Windows) / Command + “” (Mac): This shortcut allows you to zoom out instantly on your timeline. Each press of the shortcut will zoom out by a significant amount, providing a broader overview of your footage.
Utilizing these shortcuts will streamline your editing workflow and enable you to zoom out of your timeline quickly and effortlessly.
Understanding the Zoomed-Out View
When you zoom out of your DaVinci Resolve timeline, the view becomes more comprehensive, allowing you to have a broader perspective of your project. This perspective enables you to navigate and work on larger sections of your footage with ease.
In the zoomed-out view, you may notice that individual frames or markers on the time ruler appear closer together, indicating a condensed representation of your footage. This condensed view provides a higher-level overview, allowing you to locate specific sections or moments quickly.
By utilizing the zoom-out function effectively, you can enhance your navigation through the timeline and work on larger sections of your project more efficiently.
Tips for Navigating a Zoomed Timeline
When working with a zoomed-in or zoomed-out timeline in DaVinci Resolve, it’s essential to understand how to navigate efficiently to access and edit different sections of your footage. In this section, we will explore some tips for navigating a zoomed timeline effectively.
Moving Up and Down the Timeline
To move up and down the timeline when it is zoomed in or out, you can use the scroll bar. The scroll bar allows you to navigate horizontally through your footage, especially when the timeline spans a longer duration than the visible area.
To move up and down the timeline using the scroll bar, follow these steps:
- Locate the scroll bar in the timeline panel, typically positioned at the bottom of the user interface.
- Click and drag the scroll bar up or down to navigate through your footage. As you drag the scroll bar, the view of your timeline will shift accordingly, allowing you to explore different sections of your project.
By utilizing the scroll bar, you can easily navigate through your footage, regardless of the zoom level.
Using the Scroll Bar
Another way to navigate a zoomed timeline is by using the scroll wheel on your mouse. The scroll wheel allows you to scroll up and down the timeline with precision.
To navigate the timeline using the scroll wheel, follow these steps:
- Position your mouse cursor over the timeline panel.
- Rotate the scroll wheel up or down to scroll through your footage. As you rotate the scroll wheel, the view of your timeline will scroll accordingly, allowing you to explore different sections of your project.
By utilizing the scroll wheel, you can navigate through your footage smoothly and efficiently, even when the timeline is zoomed in or out.
Viewing Different Sections of the Timeline
Sometimes, you may need to view different sections of your timeline quickly without manually scrolling through your footage. In DaVinci Resolve, there are various techniques you can use to jump to specific sections of your project.
Some of these techniques include:
-
Using markers: Markers allow you to mark specific points of interest or make notes on your timeline. By placing markers at different moments in your footage, you can quickly jump to these moments by utilizing the marker controls in the timeline panel.
-
Using the time ruler: The time ruler provides markers that indicate specific points in time, such as seconds, frames, or timecode. By clicking on a specific point on the time ruler, you can instantly jump to that moment in your footage.
-
Using keyboard shortcuts: DaVinci Resolve provides various keyboard shortcuts that allow you to jump to specific sections of your timeline quickly. Familiarize yourself with these shortcuts to navigate your project efficiently.
By utilizing these techniques, you can navigate your zoomed timeline effectively and access different sections of your footage with ease.
Common Issues while Zooming In & Out of the Timeline
While zooming in and out of the timeline in DaVinci Resolve is a straightforward process, there may be some common issues that you may encounter. In this section, we will explore these issues, provide troubleshooting tips, and discuss how to reset the zoom if needed.
Troubleshooting Zoom Errors
If you are experiencing difficulties while zooming in and out of the timeline, such as unexpected behavior or errors, consider the following troubleshooting steps:
-
Check for software updates: Ensure that you are using the latest version of DaVinci Resolve, as updates may include bug fixes or improvements that can resolve any issues.
-
Restart the software: Sometimes, a simple software restart can resolve minor issues or glitches. Close DaVinci Resolve and reopen it to see if the issue persists.
-
Verify system requirements: DaVinci Resolve has specific system requirements in terms of hardware and software. Ensure that your system meets these requirements to ensure optimal performance and stability.
-
Check for conflicting settings or preferences: Incorrect or conflicting settings can sometimes interfere with the zoom function in DaVinci Resolve. Review your preferences and settings to ensure they are properly configured.
If the issue continues to persist, consider consulting the DaVinci Resolve user manual or reaching out to the official support channels for further assistance.
How to Reset Zoom
If you wish to reset the zoom level of your timeline to its default state, you can utilize the zoom slider. Here is how you can reset the zoom in DaVinci Resolve:
- Locate the zoom slider in the timeline panel.
- Click and drag the slider to the middle, between the “+” and “-” symbols. This will set the zoom level to its default state, providing a balanced view of your footage.
By resetting the zoom, you can restore the default zoom level and have an overview of your project.
Avoiding Common Mistakes
When zooming in and out of the timeline in DaVinci Resolve, it is essential to be mindful of common mistakes that can affect your editing workflow. Here are some common mistakes to avoid:
-
Overzooming: It’s easy to get caught up in zooming in too much on your timeline, which can lead to a loss of perspective and make it difficult to work with larger sections of your footage. Avoid overzooming by finding an appropriate balance between detail and overview.
-
Forgetting to reset the zoom: After completing a task that requires zooming, such as precise trimming or alignment, remember to reset the zoom to its default state. This will provide a balanced view of your project and prevent any unnecessary confusion or errors.
-
Ignoring navigation techniques: Efficient navigation is essential when working with a zoomed timeline. Be sure to utilize the scroll bar, scroll wheel, markers, and keyboard shortcuts to navigate quickly and access different sections of your footage without frustration.
By being aware of these common mistakes and incorporating best practices into your workflow, you can ensure smooth and efficient editing when zooming in and out of your DaVinci Resolve timeline.
Benefits of Efficiently Using Zoom in DaVinci Resolve
Efficiently utilizing the zoom feature in DaVinci Resolve offers several benefits that can enhance your editing workflow and improve the quality of your projects. In this section, we will explore some of these benefits and the impact of mastering the zoom function.
Increasing Precision in Editing
One of the primary benefits of utilizing the zoom feature in DaVinci Resolve is the increased precision it offers when editing your footage. By zooming in, you can focus on specific sections of your footage, allowing you to perform precise tasks such as trimming, aligning, or adding effects with accuracy.
The increased level of detail provided by zooming in enables you to make fine adjustments and achieve the desired level of precision in your edits. Whether it’s ensuring frame-accurate cuts, aligning audio with video, or adjusting keyframe positions, zooming in allows you to work with greater accuracy and achieve professional-grade results.
Improving Navigation through the Timeline
Efficiently utilizing the zoom feature also improves your navigation through the timeline. By zooming in, you can closely examine different sections of your footage, making it easier to locate specific moments, markers, or keyframes.
Additionally, zooming in can help you identify potential issues or imperfections in your footage, such as pixelation, motion blur, or audio spikes. With a closer view, you can address these issues effectively and ensure the overall quality of your project.
Conversely, zooming out provides a broader overview of your project, allowing you to navigate and work on larger sections of your footage with ease. This is especially useful when rearranging clips, adding transitions, or performing other tasks that require a high-level perspective.
By efficiently using zoom, you can streamline your navigation through the timeline and optimize your workflow.
Enhancing Workflow Efficiency
Another significant benefit of efficiently using zoom in DaVinci Resolve is the enhancement of your overall workflow efficiency. By zooming in and out at the appropriate times and levels, you can save time and effort when performing editing tasks.
Zooming in allows you to focus on specific sections of your footage, eliminating the need to scroll or navigate excessively through your timeline. This not only speeds up your editing process but also reduces the risk of errors or overlooking details.
Similarly, zooming out provides a broader view of your project, allowing you to quickly locate and access different sections of your footage. This saves time spent searching for specific clips, markers, or keyframes, improving your overall efficiency.
By effectively utilizing zoom, you can optimize your workflow, work more efficiently, and ultimately deliver your projects in a timely manner.
Advanced Zoom Techniques in DaVinci Resolve
Beyond the basic zoom features, DaVinci Resolve offers advanced techniques that allow you to further enhance your editing capabilities. In this section, we will explore some advanced zoom techniques and how they can be used in conjunction with other tools in DaVinci Resolve.
Combining Zoom with Other Tools
DaVinci Resolve provides a wide range of tools and functions that can be used in conjunction with the zoom feature to achieve complex editing tasks. By combining zoom with other tools, you can further enhance your editing capabilities and creativity.
For example, you can combine zoom with the trimming tools in DaVinci Resolve to achieve frame-accurate cuts and precise alignment. By zooming in on specific sections of your footage, you can manipulate the trimming handles with accuracy, ensuring seamless transitions and perfectly synchronized audio and video.
You can also combine zoom with the Fusion page in DaVinci Resolve to add advanced visual effects and motion graphics to your footage. By zooming in, you can create intricate animations and complex visual compositions with precision.
By exploring the various tools and functions in DaVinci Resolve and using them in conjunction with the zoom feature, you can push the boundaries of your editing capabilities and create stunning and captivating videos.
Customizing the Zoom Function
DaVinci Resolve provides the ability to customize the zoom function, allowing you to tailor it to your specific preferences and workflow. By customizing the zoom function, you can further optimize your editing experience and achieve greater efficiency.
To customize the zoom function in DaVinci Resolve, follow these steps:
- Go to the Preferences menu in DaVinci Resolve.
- Locate the Zoom category within the Preferences window.
- Explore the various options and settings available, such as zoom increments, keyboard shortcuts, or default zoom levels.
- Adjust the settings according to your preferences and workflow requirements.
- Apply the changes and exit the Preferences window.
By customizing the zoom function, you can align it with your personal editing style, allowing for a more intuitive and seamless editing experience.
Zooming Techniques for Complex Projects
Complex projects often require meticulous attention to detail and precise editing. In such cases, employing specific zooming techniques can help streamline your workflow and achieve greater control over your footage.
One such technique is the use of multiple zoom levels within a single project. By strategically zooming in and out at different stages of the editing process, you can focus on specific sections for precise adjustments and then zoom out for a broader perspective during transitions or overall quality checks.
Another technique is utilizing keyframes in conjunction with zoom. By animating the zoom from one level to another within a clip, you can create dynamic visual effects or dramatic transitions. This technique allows you to guide the viewer’s focus or emphasize specific moments in your footage.
By experimenting with different zooming techniques and incorporating them into your editing workflow, you can achieve greater control and creativity in your projects.
Conclusion
Mastering the zoom function in DaVinci Resolve is essential for precise editing and navigation. By understanding the various aspects of the software, including its features, interface, and timeline, you can use the zoom tool effectively to enhance your editing workflow.
In this article, we explored the overview and features of DaVinci Resolve, providing insights into its capabilities as an all-in-one video editing software. We discussed the components and working principles of the timeline, as well as techniques for accessing and utilizing the zoom feature.
We also provided tips for navigating a zoomed timeline, troubleshooting common issues while zooming in and out, and the benefits of efficiently using zoom in DaVinci Resolve. Additionally, we discussed advanced zoom techniques and how to customize the zoom function according to your preferences.
By mastering the zoom function in DaVinci Resolve, you can achieve greater precision in your editing, enhance your navigation through the timeline, and improve your overall workflow efficiency. With its extensive features and user-friendly interface, DaVinci Resolve provides the tools and capabilities necessary to bring your creative vision to life.
For further resources and in-depth tutorials on DaVinci Resolve, you can explore additional materials available on professional platforms, official documentation, or online communities dedicated to DaVinci Resolve users.
Mastering the zoom function in DaVinci Resolve will undoubtedly have a positive impact on your video editing skills, allowing you to create professional-grade videos with confidence and precision.
