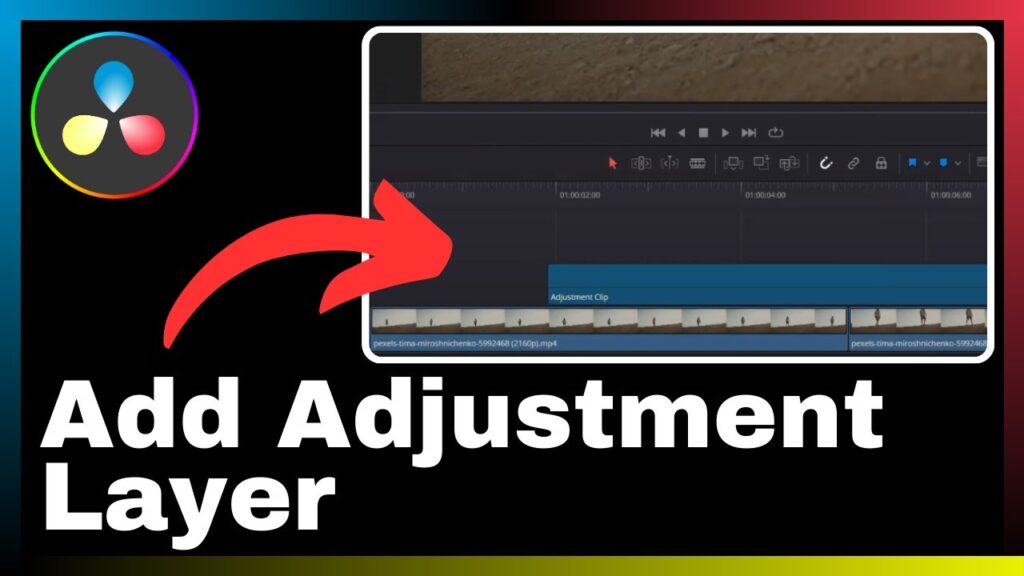
In this informative video tutorial by Media Magnet Guide, you will learn the step-by-step process of adding an adjustment layer in DaVinci Resolve, a powerful software used for video editing, color correction, visual effects, and audio post-production. Adjustment layers play a crucial role in enhancing the efficiency and ease of video editing, making them an essential tool for professionals and beginners alike. By following the instructions provided in this tutorial, you will gain the knowledge and skills necessary to effectively utilize adjustment layers in your video editing projects. Stay tuned to unlock the full potential of DaVinci Resolve and take your video editing skills to new heights.
DaVinci Resolve boasts a comprehensive set of tools that cater to the needs of projects of all sizes and complexities. Whether you are a seasoned professional or just starting your journey in video editing, this software offers a user-friendly interface and a wide range of features that will assist you in achieving your desired results. By mastering the technique of adding adjustment layers, you can enhance the overall quality and visual appeal of your videos while maintaining efficiency in your editing workflow. So, join Media Magnet Guide in this tutorial and unlock the full potential of DaVinci Resolve.
Understanding DaVinci Resolve
Brief overview of DaVinci Resolve
DaVinci Resolve is an all-in-one video editing, color correction, visual effects, and audio post-production software. It is a comprehensive tool that offers a range of features and capabilities to both professionals and beginners. With its user-friendly interface and powerful tools, DaVinci Resolve has become a popular choice for video editing projects of all sizes and complexities.
Importance of DaVinci Resolve for video editing
DaVinci Resolve plays a crucial role in the field of video editing. It provides users with a wide range of editing tools and features that allow for seamless editing and post-production processes. Whether you are a professional editor or a beginner, DaVinci Resolve can significantly enhance your editing workflow and help you achieve professional-quality results.
How DaVinci Resolve works
DaVinci Resolve utilizes a node-based editing system, which allows for non-destructive editing. This means that any changes made to your footage or effects are not applied directly to the original media files, preserving their integrity. DaVinci Resolve also offers real-time playback, color grading capabilities, and support for various formats, making it a versatile and efficient tool for video editing.
Understanding Adjustment Layers
What is an adjustment layer?
An adjustment layer is a special layer that allows you to apply effects, corrections, and modifications to multiple clips in your timeline simultaneously. It acts as a container for these adjustments and can be placed above the clips you want to modify. By using adjustment layers, you can save time and effort by applying the same changes to multiple clips at once, rather than individually adjusting each clip.
Uses of adjustment layers in video editing
Adjustment layers have various uses in video editing. They can be used to apply color corrections and grading, add visual effects, apply filters and effects, and make overall adjustments to the appearance of your footage. Additionally, adjustment layers can be used to create custom effects, such as vignettes, blurs, and stylized looks, giving you a great degree of creative control over your project.
Advantages of using adjustment layers
There are several advantages to using adjustment layers in your video editing workflow. Firstly, they allow for non-destructive editing, as the original clips are not permanently modified. This means you can always go back and make changes without affecting the original clips. Additionally, adjustment layers provide a centralized control point for making changes to multiple clips, greatly increasing efficiency and saving time. They also allow for easy experimentation, as you can quickly toggle effects on and off to see the impact on your footage.
Accessing Adjustment Layers in DaVinci Resolve
Steps to locate adjustment layers
To access adjustment layers in DaVinci Resolve, follow these steps:
- Open DaVinci Resolve and navigate to the Edit tab.
- In the Media Pool, select the adjustment layer icon (usually represented as a blank white square).
- Drag the adjustment layer icon onto the timeline above the clips you want to modify.
By following these steps, you will be able to locate and add adjustment layers to your project in DaVinci Resolve.
Understanding the adjustment layer interface
Once you have added an adjustment layer to your timeline, you can view and modify it using the adjustment layer interface. This interface typically appears as a separate track above the main video tracks in the timeline. By clicking on the adjustment layer, you can access the various controls and settings associated with it.
Basic features of adjustment layers
Adjustment layers offer a range of basic features that allow you to make modifications to your footage. These features include controls for color correction, grading, effects, filters, and overall adjustments. By adjusting these settings, you can create the desired look and feel for your project, ensuring consistency and coherence across multiple clips.

Adding Adjustment Layer in DaVinci Resolve
Steps to add an adjustment layer
To add an adjustment layer in DaVinci Resolve, follow these steps:
- Open DaVinci Resolve and navigate to the Edit tab.
- In the Media Pool, select the adjustment layer icon.
- Drag the adjustment layer icon onto the timeline above the clips you want to modify.
- Adjust the length of the adjustment layer to match the duration of the clips you want to modify.
By following these steps, you will be able to add an adjustment layer to your project in DaVinci Resolve.
Tips for successfully adding adjustment layers
When adding adjustment layers, it is important to keep a few tips in mind to ensure successful integration into your project. Firstly, ensure that the adjustment layer is properly aligned with the clips you want to modify. This will prevent any unintended effects or overlaps. Additionally, consider organizing your adjustment layers by grouping them or color-coding them for easier management and identification.
Common problems and solutions when adding adjustment layers
When adding adjustment layers, you may encounter some common problems. One common issue is that the adjustment layer may not function as expected or may not apply to the desired clips. To resolve this, double-check the alignment and order of the adjustment layer in the timeline. Additionally, ensure that there are no conflicting effects or adjustments applied to the clips that may interfere with the adjustment layer.
Adjusting Adjustment Layers in DaVinci Resolve
How to modify adjustment layers
Modifying adjustment layers in DaVinci Resolve involves adjusting the settings and controls associated with them. By selecting the adjustment layer in the timeline, you can access these settings and make changes as needed. The specific modifications will depend on the desired effect or adjustment you want to achieve.
Creating custom effects with adjustment layers
One of the key advantages of adjustment layers is the ability to create custom effects. By combining various controls, filters, and effects, you can create unique looks and styles for your footage. Experiment with different combinations and settings to achieve the desired effect. Additionally, you can save these custom effects as presets for future use.
Changing the properties of adjustment layers
Adjustment layers in DaVinci Resolve offer a range of properties that can be modified to achieve the desired result. These properties may include adjustments for exposure, contrast, saturation, color balance, and more. By adjusting these properties, you can fine-tune the appearance of your clips and ensure consistency throughout your project.
Deleting Adjustment Layers in DaVinci Resolve
Steps to delete an adjustment layer
To delete an adjustment layer in DaVinci Resolve, follow these steps:
- Locate the adjustment layer in the timeline.
- Right-click on the adjustment layer and select “Delete” from the context menu.
- Confirm the deletion when prompted.
By following these steps, you can easily delete an adjustment layer from your project in DaVinci Resolve.
Important considerations when deleting adjustment layers
There are a few important considerations to keep in mind when deleting adjustment layers. Firstly, deleting an adjustment layer will remove all the effects and modifications applied to the clips beneath it. Make sure to have a backup or an undo option available if you need to revert any changes. Additionally, ensure that you are deleting the correct adjustment layer to avoid any unintended consequences.
How deletion of adjustment layers affects the overall video
Deleting an adjustment layer will remove all the effects and modifications applied to the clips beneath it. This means that any changes made to the appearance of the clips will be reverted to their original state. It is important to consider the impact of deleting an adjustment layer on the overall look and feel of your video. Make sure to review the clips and make any necessary adjustments before deleting the adjustment layer.
Common Mistakes When Using Adjustment Layers
Mistakes to avoid when adding adjustment layers
When adding adjustment layers, it is important to avoid certain common mistakes. One common mistake is adding too many adjustment layers, which can lead to an overwhelming number of effects and adjustments that may not work well together. Another mistake is not properly aligning the adjustment layer with the clips, which can result in unintended or inconsistent modifications.
Mistakes to avoid when modifying adjustment layers
When modifying adjustment layers, there are also mistakes to avoid. One common mistake is making excessive changes to the properties and controls, which can result in an artificial or exaggerated look. Another mistake is not properly evaluating the impact of the adjustments on the overall video, leading to inconsistent or conflicting effects.
How to correct these common mistakes
To correct these common mistakes, it is important to approach adjustment layers with a thoughtful and deliberate mindset. Before adding or modifying adjustment layers, consider the desired outcome and the overall aesthetic of your project. Limit the number of adjustment layers to only those that are necessary and complement each other. Take the time to carefully align and evaluate the impact of the adjustments to ensure a cohesive and professional-looking result.
Advanced Tips for Using Adjustment Layers
Tricks for efficient use of adjustment layers
To efficiently use adjustment layers, consider the following tricks:
- Group adjustment layers based on their purpose or effect to keep your timeline organized.
- Use adjustment layer presets to save and apply commonly used effects quickly.
- Experiment with blending modes and opacity settings to create more subtle or complex effects.
- Explore the use of masks and shapes to apply adjustments to specific areas of your footage.
By employing these tricks, you can maximize the power and efficiency of adjustment layers in your video editing workflow.
Creating complex effects using adjustment layers
Adjustment layers offer a wide range of tools and controls that can be combined to create complex effects. By leveraging the properties and effects available, you can achieve unique looks and styles for your footage. Consider combining color grading, filters, overlays, and masks to create intricate and visually stunning effects.
Organizing adjustment layers for easier editing
As your project grows in complexity, it becomes essential to organize your adjustment layers for easier editing. Consider grouping them based on their purpose or effect, and use color coding or labels to quickly identify them. Additionally, utilize folders or bins to further categorize and organize your adjustment layers. This will save time and effort when navigating and modifying your project.
Comparison with Other Video Editing Tools
How DaVinci Resolve and adjustment layers compare with other tools
DaVinci Resolve, with its comprehensive features and adjustment layer capabilities, stands out among other video editing tools. While other editing software may offer adjustment layer functionality, DaVinci Resolve provides a more intuitive and user-friendly interface. Additionally, the node-based editing system in DaVinci Resolve allows for greater flexibility and non-destructive editing.
Strengths and weaknesses of DaVinci Resolve
Some of the strengths of DaVinci Resolve include its powerful color grading capabilities, real-time playback, and extensive toolset. It also provides seamless integration with other post-production workflows, such as audio editing and visual effects. However, DaVinci Resolve may have a steep learning curve for beginners, and its resource-intensive nature may require a powerful computer setup.
Ideal use-cases for using DaVinci Resolve and adjustment layers
DaVinci Resolve and adjustment layers are ideal for a wide range of use-cases. They are particularly suited for projects that require precise color grading, visual effects, and overall adjustments. Whether you are working on a short film, a music video, a documentary, or a commercial, DaVinci Resolve and adjustment layers provide the necessary tools and capabilities to achieve professional-quality results.
Conclusion
Key takeaways about using adjustment layers in DaVinci Resolve
Adjustment layers are a powerful tool in DaVinci Resolve that allow for efficient and effective video editing. They provide a centralized control point for making changes to multiple clips, offer non-destructive editing capabilities, and enable the creation of custom effects. By understanding the nuances of adjustment layers and utilizing them effectively, you can enhance your video editing workflow and achieve professional-looking results.
Who should use DaVinci Resolve and its adjustment layers?
DaVinci Resolve and its adjustment layers are suitable for both professionals and beginners in the field of video editing. Professionals can take advantage of its extensive toolset and advanced capabilities, while beginners can benefit from its user-friendly interface and intuitive features. Whether you are a filmmaker, a YouTuber, or a content creator, DaVinci Resolve and adjustment layers can greatly enhance your editing process.
Helpful resources for more learning about DaVinci Resolve
If you want to learn more about DaVinci Resolve and its adjustment layers, there are several resources available. Online tutorials, forums, and user communities are a great way to access additional information and insights. Additionally, the official DaVinci Resolve website provides comprehensive documentation, user guides, and tutorials to help you further explore and master the software.


