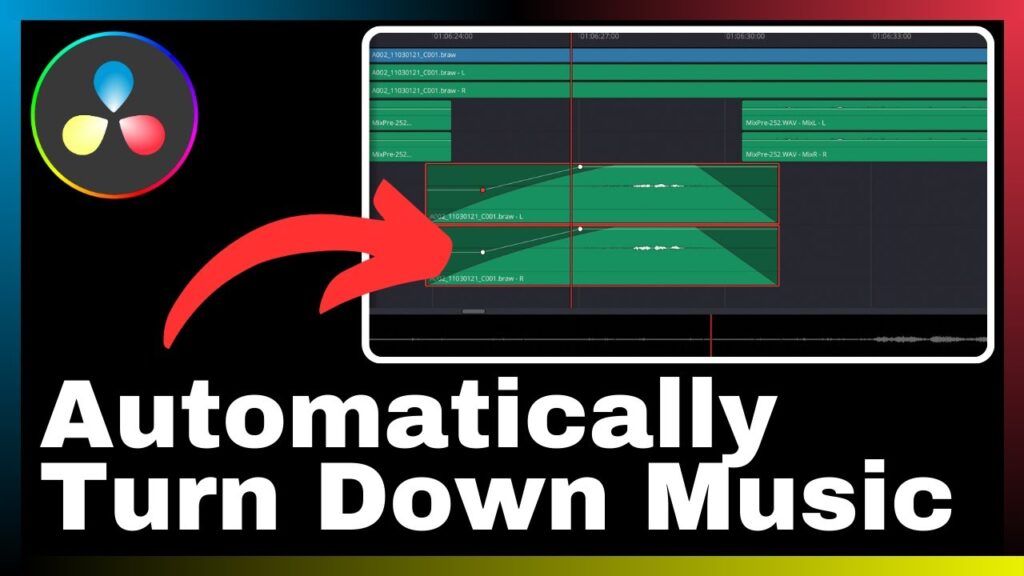
“How to Automatically Turn Down Music When People Talk in DaVinci Resolve” is a video tutorial by Media Magnet Guide that explores the process of adjusting music volume during dialogue scenes using DaVinci Resolve. In this tutorial, you will learn the step-by-step instructions for automatically turning down the music whenever people are speaking in your videos. DaVinci Resolve, an all-in-one software for video editing, color correction, visual effects, and audio post-production, offers a comprehensive set of tools that cater to both professionals and beginners, making it a popular choice for projects of all sizes and complexities.
The tutorial aims to provide valuable insights into this technique, allowing you to enhance the overall quality of your videos by maintaining a balanced audio mix. By following the instructions provided, you will be able to achieve seamless transitions between dialogue and music, creating a more immersive and engaging viewing experience for your audience.

Understanding DaVinci Resolve
Explanation of DaVinci Resolve
DaVinci Resolve is a powerful video editing software that offers a comprehensive set of tools for professionals and beginners alike. It is known for its capabilities in color correction, visual effects, audio post-production, and video editing. With its user-friendly interface and extensive features, it has become a popular choice for video creators of all skill levels.
Major Features of DaVinci Resolve
DaVinci Resolve offers a wide range of features that contribute to its versatility and popularity. Some of its major features include:
- Color Correction: DaVinci Resolve provides advanced color grading tools, allowing users to enhance the visual aesthetic of their videos.
- Visual Effects: The software offers a variety of visual effects options to add an extra layer of creativity and professionalism to videos.
- Audio Post-Production: With its audio editing capabilities, DaVinci Resolve allows users to fine-tune audio tracks and create a balanced sound mix.
- Video Editing: DaVinci Resolve offers powerful video editing tools, allowing users to cut, trim, and arrange video clips to create a cohesive and engaging final product.
The Importance of Background Music and Dialogue in Video Creation
Role of Background Music in Video Production
Background music plays a crucial role in video production as it helps set the tone and atmosphere of a video. It enhances the overall viewing experience by eliciting emotions and creating a connection with the audience. Background music can add excitement, suspense, or sentimentality, depending on the desired effect. It is essential to choose music that aligns with the video’s theme, pacing, and target audience.
Role of Dialogue in Video Presentation
Dialogue is an integral part of video presentation, especially in narrative-driven content such as films, documentaries, and interviews. It helps convey information, develop characters, and advance the storyline. Well-captured and clear dialogue is crucial for ensuring that the message and intended emotions are effectively communicated to the audience. Properly balancing dialogue with other audio elements is essential for creating a high-quality video.
Balancing Background Music and Dialogue in DaVinci Resolve
Understanding the Necessity of Balanced Audio
Achieving a balanced audio mix is essential for delivering a professional-quality video. Properly balancing background music and dialogue ensures that both elements are audible and enhance the overall viewing experience. When the audio mix is unbalanced, the background music may overpower the dialogue, making it difficult for the audience to understand what is being said. Similarly, if the music is too low, it may lose its impact and fail to create the desired emotional response.
Tips to Balance Background Music and Dialogue
To achieve a balanced audio mix in DaVinci Resolve, follow these tips:
- Use audio meters: Utilize the audio meters in DaVinci Resolve to visually monitor the levels of background music and dialogue. Ensure that the audio levels stay within an acceptable range to prevent clipping or distortion.
- Adjust audio keyframes: Manually adjust the audio keyframes to balance the volume of the background music and dialogue. Increase or decrease the volume as needed to achieve a harmonious mix.
- Utilize automated volume adjustment: DaVinci Resolve offers automated volume adjustment features that can help balance the audio mix. These features can detect dialogue and automatically reduce the volume of the background music during those parts. This ensures that the dialogue remains clear and audible.
Introduction to Automatic Volume Adjustment in DaVinci Resolve
The Need for Automatic Volume Adjustment
Automatic volume adjustment is a valuable feature in DaVinci Resolve that simplifies the process of balancing background music and dialogue. Rather than manually adjusting audio levels and keyframes, this feature automatically detects dialogue and reduces the volume of the background music during those sections. This ensures that the dialogue remains clear and prominent.
Basic Overview of Auto Volume Adjustment in DaVinci Resolve
Auto volume adjustment in DaVinci Resolve utilizes advanced algorithms to detect and analyze audio. It identifies dialogue segments and automatically reduces the volume of the background music during those portions. This feature saves time and effort for video creators, allowing them to focus on other aspects of video production while still achieving a balanced and professional audio mix.
Step-by-Step Guide to Automatically Turn Down Music When People Talk
Accessing Audio Panel in DaVinci Resolve
To access the audio panel in DaVinci Resolve, follow these steps:
- Open DaVinci Resolve and load your project.
- Locate the audio panel, which is typically found in the lower corner of the interface.
- Click on the audio panel to expand it and reveal the audio controls.
Adjusting Audio Keyframes
To manually adjust audio keyframes and balance background music and dialogue, follow these steps:
- In the audio panel, locate the audio track containing the background music.
- Identify the sections where dialogue occurs and adjust the keyframes accordingly. Lower the volume during dialogue sections and raise it afterward to maintain a natural audio flow.
Fine-Tuning the Automatic Volume Reduction Feature
To fine-tune the automatic volume reduction feature in DaVinci Resolve, follow these steps:
- In the audio panel, locate the settings for automatic volume reduction.
- Adjust the sensitivity and threshold settings to match your preferences and the specific requirements of your project.
- Test the automatic volume reduction feature by playing back sections with dialogue. Make adjustments as needed until the desired balance between background music and dialogue is achieved.
Advanced Editing Tips for Automatic Volume Adjustment
Advanced Techniques for Keyframe Manipulation
To take your keyframe manipulation to the next level, consider these advanced editing tips:
- Create keyframe curves: Instead of having straight volume transitions, experiment with creating curves for smoother and more gradual transitions.
- Utilize multiple audio tracks: Splitting the audio into multiple tracks allows for more precise control over the balance between background music and dialogue. Adjust the volume levels on each track independently to achieve the desired mix.
Tips for Fine-Tuning Automatic Volume Reduction
Here are some additional tips for fine-tuning the automatic volume reduction feature:
- Refine the sensitivity and threshold settings: Experiment with different sensitivity and threshold settings to find the optimal balance between reducing background music volume during dialogue and maintaining an appropriate background music presence.
- Manual adjustments: Even with automatic volume reduction, manual adjustments may be necessary in certain instances. Use audio keyframes to manually adjust the volume levels for specific sections to maintain control over the audio mix.
Troubleshooting Common Issues with Automatic Volume Adjustment
Common Issues with Automatic Volume Adjustment
While automatic volume adjustment in DaVinci Resolve is a powerful tool, it may encounter certain issues. Some common issues include:
- Incorrect detection of dialogue segments: The automatic volume reduction feature may not accurately identify dialogue segments, leading to improper volume adjustments.
- Over-reduction of background music: In some instances, the automatic volume reduction feature may excessively reduce the volume of the background music, resulting in an unbalanced mix.
Resolving Frequent Challenges in Automatic Volume Reduction
To tackle the challenges associated with automatic volume reduction, consider the following troubleshooting steps:
- Manually adjust keyframes: If the automatic volume reduction feature is not functioning correctly, manually adjusting the audio keyframes can help achieve the desired balance.
- Modify sensitivity and threshold settings: Experiment with different sensitivity and threshold settings to improve the accuracy of the automatic volume reduction.
- Split audio tracks: If the automatic volume reduction feature consistently produces unsatisfactory results, consider splitting the audio into multiple tracks. This allows for more granular control over the audio mix.
Additional Features to Enhance Video Presentation in DaVinci Resolve
Overview of Additional Features available
In addition to automatic volume adjustment, DaVinci Resolve offers a range of additional features to enhance video presentation. Some of these features include:
- Color grading tools: DaVinci Resolve provides advanced color grading capabilities, allowing users to achieve the desired look and feel for their videos.
- Visual effects: The software offers a vast array of visual effects options to add creative elements and enhance the visual appeal of videos.
- Audio effects and mixing: DaVinci Resolve provides a wide range of audio effects to enhance the overall audio quality and create immersive soundscapes.
Leveraging Additional Features for Improved Video Presentation
To leverage the additional features in DaVinci Resolve for improved video presentation, consider the following tips:
- Experiment with color grading: Use the color grading tools to adjust the color balance, contrast, and saturation to achieve the desired visual aesthetic.
- Incorporate visual effects sparingly: While visual effects can enhance a video, it is crucial to use them judiciously. Overuse of visual effects can distract from the content and undermine the overall quality of the video.
- Utilize audio effects: Enhance the audio experience by using audio effects such as equalization, reverb, and compression. These effects can help create a polished and professional audio mix.
Must-Have DaVinci Resolve Plugins for Advanced Audio Management
List of Popular DaVinci Resolve Plugins for Audio Management
There are numerous plugins available for DaVinci Resolve that can enhance the audio management capabilities of the software. Some popular plugins include:
- Waves Audio: Waves offers a wide range of audio plugins that can be seamlessly integrated into DaVinci Resolve. These plugins provide advanced audio processing and mixing capabilities.
- iZotope RX: iZotope RX is a powerful audio restoration plugin that can help eliminate background noise, clicks, and pops from audio recordings.
- FabFilter Pro-Q: FabFilter Pro-Q is a versatile equalizer plugin that allows for precise control of frequency content. It can be used to shape the tonal balance of audio tracks.
How to Install and Use DaVinci Resolve Plugins
To install and use plugins in DaVinci Resolve, follow these steps:
- Find the desired plugin and download the installer from the manufacturer’s website.
- Run the installer and follow the on-screen instructions to install the plugin on your computer.
- Launch DaVinci Resolve and open the project you want to work on.
- In the audio panel, locate the plugin section, and select the desired plugin from the available options.
- Apply the plugin to the audio tracks as needed, and adjust the plugin settings to achieve the desired audio effect.
Conclusion
Recap of Automatically Turning Down Music When People Talk
Automatic volume adjustment in DaVinci Resolve is a valuable feature that simplifies the process of balancing background music and dialogue in video creation. By automatically reducing the volume of the background music during dialogue sections, it ensures that the dialogue remains clear and audible, enhancing the overall viewing experience.
Final thoughts on DaVinci Resolve Automatic Volume Adjustment
DaVinci Resolve’s automatic volume adjustment feature is a powerful tool that saves time and effort while delivering professional-quality audio mixes. By utilizing this feature, video creators can create a balanced audio mix that enhances the impact and effectiveness of their videos. Combined with the other features and capabilities of DaVinci Resolve, it becomes an essential tool for video production professionals and enthusiasts alike.


