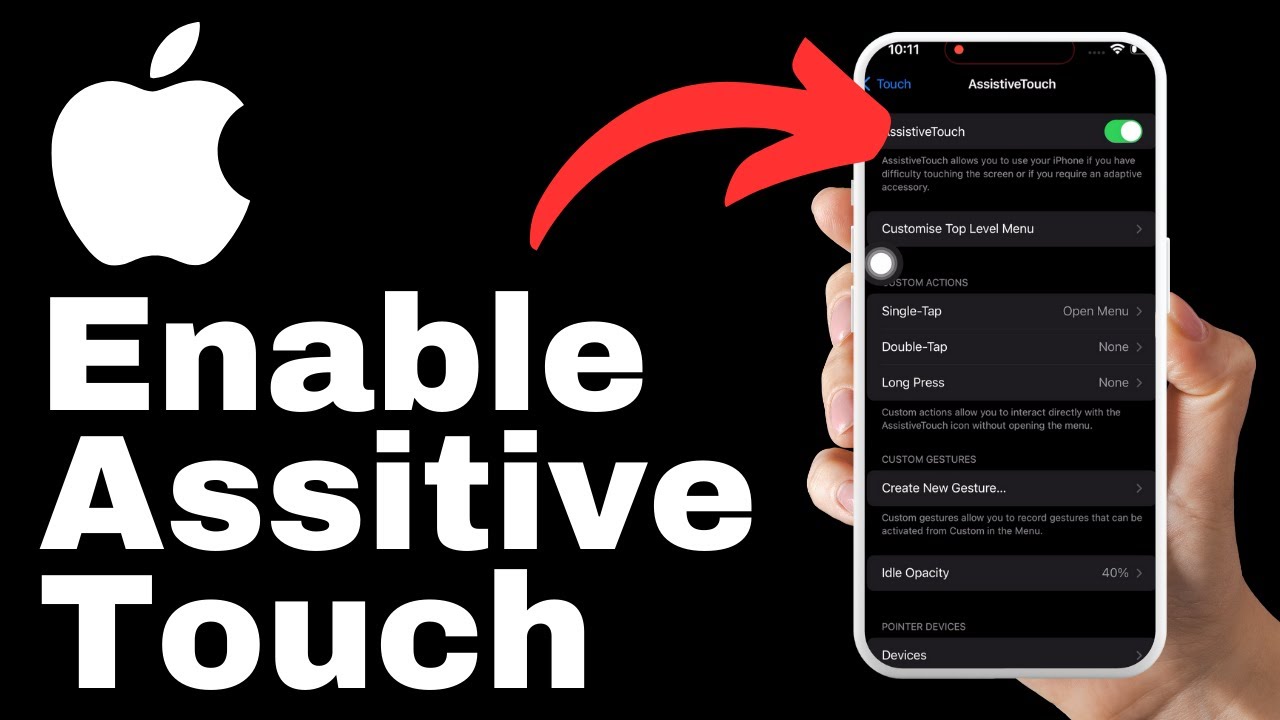
Discover how to customize the video recording resolution on your iPhone 15 for optimal video quality in this informative guide. iPhones, renowned for their sleek design, powerful performance, and user-friendly interface, have revolutionized the way we capture memories and stay connected to the digital world. With an array of models catering to various needs, iPhones set the standard for excellence in the smartphone industry. In this tutorial, we will show you step-by-step instructions on how to change the video recording resolution on your iPhone 15. By understanding how to navigate your settings, you can achieve the best results and capture videos that meet your preferences and needs. Experiment with different resolutions to find the perfect balance between video quality and storage space. Whether you’re a professional creator or simply capturing casual videos, this guide will ensure you maximize the capabilities of your iPhone 15 and produce high-quality footage. Subscribe to our channel for more valuable tutorials and visit our website for additional resources.
Unlock the full potential of your iPhone 15’s video recording capabilities by changing the resolution to suit your preferences and needs. In this tutorial, we’ll guide you through the process, step by step, so you can capture videos with the best quality possible. Open your camera app, navigate to the settings menu, and look for the camera option. Within the camera settings, you’ll find different video types to choose from, including standard recording, slow-motion, and cinematic mode. Each mode has its distinct characteristics and effects, allowing you to adapt your videos to diverse situations. After selecting the video type, proceed to choose the resolution that best suits your needs, whether it’s 1080p at 30 FPS or 4K at 60 FPS. Higher resolutions offer sharper and more detailed footage but require more storage space, while lower resolutions are ideal for saving storage and casual videos. Find the perfect combination that aligns with your preferences, and don’t forget to like, comment, and subscribe to support our channel.

Understanding iPhone 15 Video Recording Capabilities
Understanding the importance of video recording resolution
When it comes to capturing videos on your iPhone 15, understanding the importance of video recording resolution is crucial. Video resolution refers to the level of detail in your video, typically measured in pixels. Higher resolutions result in sharper and more detailed footage, but they also require more storage space. On the other hand, lower resolutions can save storage space and work well for casual videos. By understanding the implications of video resolution, you can customize the video recording capabilities of your iPhone 15 to suit your preferences and needs.
Mapping out the video capabilities of iPhone 15
The iPhone 15 offers a range of video recording capabilities that allow you to capture various types of videos. From standard recording to slow-motion and cinematic modes, each mode has its unique characteristics and features. Video mode is suitable for standard recording, while slow-mo mode enables you to capture high-frame rate slow motion footage. Cinematic mode enhances the visual quality of your videos with specific effects. By understanding the different video capabilities of your iPhone 15, you can choose the best mode for your specific recording needs.
Defining the different modes of video recording in iPhone 15
The iPhone 15 offers different modes of video recording to cater to diverse recording needs. Video mode is the standard mode for recording videos. It captures footage at a standard frame rate and resolution, providing a balanced level of detail and file size. Slow-mo mode allows you to capture videos at a high frame rate, resulting in smooth slow-motion playback. With cinematic mode, you can add a cinematic look and feel to your videos by applying depth-of-field effects. By understanding the different modes of video recording, you can choose the mode that best suits your desired outcome.
Accessing the iPhone 15 Camera App
Steps to open the camera app
To access the camera app on your iPhone 15, follow these simple steps:
- Locate the camera app icon on your device’s home screen.
- Tap on the camera app icon to open it.
Alternatively, you can also access the camera app by swiping left on your iPhone’s lock screen.
Overview of the camera interface and its features
Once you have opened the camera app, you will be greeted with the camera interface. The camera interface includes various features and options that allow you to customize your video recording experience.
Some of the key features of the camera interface include:
- Shutter button: This is used to start and stop video recording.
- Switch camera button: This allows you to switch between the front and rear camera.
- Flash control: This allows you to adjust the flash settings for your videos.
- Live Photo toggle: This enables you to capture live photos alongside your videos.
- Zoom control: This allows you to zoom in or out while recording videos.
By familiarizing yourself with the camera interface and its features, you can easily navigate and make adjustments to enhance your video recording experience.
Understanding the role of the camera app in video recording
The camera app plays a crucial role in video recording on your iPhone 15. It serves as the interface through which you can access and control various video recording settings. From choosing the type of video to record to adjusting video resolution and other settings, the camera app provides a user-friendly platform for customizing your video recording experience. By understanding the functionality of the camera app, you can make the most out of your iPhone 15’s video recording capabilities.
Navigating to the Camera Settings
Detailing the route to the camera settings
To navigate to the camera settings on your iPhone 15, follow these steps:
- Open the camera app on your iPhone 15.
- Locate the settings icon within the camera interface. This icon is usually represented by a gear or sliders.
- Tap on the settings icon to access the camera settings menu.
The camera settings menu allows you to make adjustments to various video recording settings, including resolution, frame rate, and other related options.
Understanding the symbols or icons that lead to the settings interface
Within the camera interface, you will come across various symbols or icons that indicate the presence of the settings interface. These icons may vary depending on the version of iOS on your iPhone 15. Look for icons that represent gears, sliders, or a settings menu.
To access the camera settings, simply tap on the appropriate icon, and you will be directed to the settings interface where you can fine-tune your video recording preferences.
Pointing out the importance of mastering the navigation for an efficient adjustment process
Mastering the navigation to the camera settings on your iPhone 15 is essential for an efficient adjustment process. By familiarizing yourself with the location of the settings icon and understanding how to access the camera settings menu, you can streamline the process of making adjustments to your video recording settings. This level of mastery will save you time and ensure that you can quickly optimize your video recording resolution and other settings as needed.

Overview of the Camera Settings Menu
Breaking down the options within the camera settings
The camera settings menu on your iPhone 15 offers a range of options that allow you to customize your video recording experience. Some of the key options within the camera settings menu include:
- Video resolution: This option enables you to choose the level of detail in your video recording, ranging from lower resolutions to higher resolutions.
- Frame rate: This option allows you to adjust the number of frames captured per second, influencing the smoothness of your video playback.
- Exposure control: This option enables you to manually control the exposure settings for your videos, adjusting the brightness and overall lighting.
- Focus control: This option allows you to manually control the focus settings for your videos, ensuring that the desired subject is in focus.
- Video stabilization: This option enables you to activate or deactivate video stabilization, reducing shakiness and enhancing the stability of your videos.
By exploring and understanding these options within the camera settings menu, you can tailor your video recording settings to meet your specific requirements.
Probing the range of possibilities within each setting
Each setting within the camera settings menu offers a range of possibilities that allow you to fine-tune your video recording preferences. For example, within the video resolution setting, you can choose from various options such as 1080p at 30 FPS or 4K at 60 FPS. Each resolution option has its own implications on storage space and video quality.
Similarly, the frame rate setting allows you to choose between different frame rates, influencing the smoothness of your video playback. Higher frame rates result in smoother motion, while lower frame rates can create a more artistic or dramatic effect.
By probing the range of possibilities within each setting, you can experiment with different combinations and find the settings that best suit your desired video recording outcome.
Highlighting the usefulness of being well-acquainted with the settings menu
Being well-acquainted with the camera settings menu on your iPhone 15 is incredibly useful for maximizing your video recording capabilities. By understanding how each setting functions and how they interact with one another, you can make informed decisions when adjusting your video recording preferences. This familiarity with the settings menu allows for a more efficient adjustment process and ensures that you can achieve the desired video quality and outcome.
Choosing the Type of Video to Record
Discussing the different types of video recording options
The iPhone 15 offers various types of video recording options, each suited for different recording scenarios. Some of the common video recording options include:
- Record video: This is the standard video recording option that allows you to capture videos at a standard frame rate and resolution.
- Record slow-mo: This option enables you to capture high-frame rate slow-motion footage, perfect for capturing fast-moving subjects with intricate detail.
- Record cinematic: Cinematic mode enhances the visual quality of your videos by applying depth-of-field effects and other cinematic features. It adds a professional touch to your video recordings.
Understanding the different types of video recording options allows you to select the most suitable option based on your specific recording needs.
Understanding the unique features of each video type
Each type of video recording option on your iPhone 15 offers unique features and benefits. The standard video recording option provides a balanced level of detail and file size, making it suitable for general recording purposes.
Slow-mo mode, on the other hand, allows you to capture slow-motion footage at a high-frame rate, resulting in smooth and detailed slow-motion playback. This mode is ideal for capturing fast-paced action or capturing intricate details that may not otherwise be noticeable.
Cinematic mode enhances the visual quality of your videos by applying depth-of-field effects and other cinematic features. It adds a professional touch to your video recordings, making them visually appealing and engaging.
By understanding the unique features of each video type, you can choose the most appropriate option based on the content you want to capture.
Giving practical scenarios where each video type would be most effective
To provide further clarity on the effectiveness of each video type, let’s explore some practical scenarios where each option would be most suitable:
-
Record video: This option is ideal for recording everyday moments, such as family gatherings, vacations, or casual events. It provides a good balance of detail and file size, ensuring that your videos are clear and easily shareable.
-
Record slow-mo: Slow-mo mode is perfect for capturing fast-moving subjects, such as sports events, action sequences, or nature footage. It allows you to capture intricate details that may go unnoticed in regular speed recording.
-
Record cinematic: Cinematic mode is best suited for capturing visually stunning moments, such as landscapes, artistic shots, or professional-grade content. It enhances the visual quality of your videos, making them more immersive and visually appealing.
By considering the specific scenarios and content you intend to capture, you can make an informed decision on the most effective video type for your needs.
Selecting Video Recording Resolution
Defining video resolution and its implications on storage space
Video resolution refers to the level of detail in your video recording, typically measured in pixels. Higher resolutions, such as 4K, offer more detailed and sharper footage, but they also require more storage space. On the other hand, lower resolutions, like 1080p, provide less detail but require less storage space.
It’s important to consider your storage capabilities when selecting the video recording resolution. If you have ample storage space and prioritize high-quality video footage, opting for a higher resolution may be suitable. However, if storage space is limited or if you primarily record casual videos, lower resolutions can still yield satisfactory results while saving storage space.
Breaking down the steps in choosing video resolution
To choose the video resolution on your iPhone 15, follow these steps:
- Open the camera app on your iPhone 15.
- Navigate to the camera settings menu.
- Locate the video resolution option within the settings menu.
- Tap on the video resolution option to view the available resolutions.
- Select the desired resolution based on your preferences and storage capabilities.
By following these steps, you can easily customize the video resolution according to your specific requirements.
Discussing the merits and drawbacks of high and low resolutions
Both high and low resolutions have their own merits and drawbacks. High resolutions, such as 4K, offer exceptional detail and sharpness, resulting in professional-quality footage. These resolutions are ideal for professional videographers or individuals who prioritize high-quality video content.
However, high resolutions also require significantly more storage space compared to lower resolutions. This can be a limiting factor if your device has limited storage capacity or if you prefer to record longer videos. Additionally, high resolutions may also require more processing power, potentially impacting the overall performance of your device.
On the other hand, low resolutions, such as 1080p, require less storage space and are suitable for recording casual videos or situations where storage is a concern. These resolutions offer a good balance between file size and image quality, making them ideal for everyday recording needs.
By considering the merits and drawbacks of high and low resolutions, you can make an informed decision based on your storage capabilities and desired video quality.
Exploring Other Video Recording Settings
Delving into frame rate settings for video recording
Frame rate refers to the number of frames captured per second in a video. Higher frame rates result in smoother motion and playback, while lower frame rates can create a more artistic or dramatic effect.
Within the camera settings menu, you can find options to adjust the frame rate for your video recordings. The available frame rate options may vary depending on your specific device and software version. Common frame rate options include 30 FPS (Frames Per Second), 60 FPS, and even higher frame rates for slow-motion recording.
By choosing the appropriate frame rate for your videos, you can ensure that the motion is captured smoothly and suits the desired visual effect.
Outlining the impact of frame rate on video quality
The frame rate has a direct impact on the perceived video quality and smoothness of motion. Higher frame rates, such as 60 FPS or higher, capture more frames per second, resulting in smoother motion and playback. This is particularly beneficial for capturing fast-paced action or objects in motion.
Lower frame rates, on the other hand, can create a more cinematic or artistic effect. For example, recording at 24 FPS can mimic the look and feel of traditional film, resulting in a more dramatic and visually appealing outcome.
By understanding the impact of frame rate on video quality, you can choose the most suitable frame rate based on the content you want to capture.
Illustrating how to change other related video recording settings
In addition to video resolution and frame rate settings, there are various other video recording settings that you can adjust to further customize your recording experience. Some of these settings include:
- Exposure control: This setting allows you to manually adjust the brightness and overall lighting of your videos. By fine-tuning the exposure, you can ensure that your videos are properly lit and balanced.
- Focus control: The focus control setting enables you to manually adjust the focus settings for your videos. This is particularly useful when you want to ensure that a specific subject or object is in focus.
- Video stabilization: This setting allows you to activate or deactivate video stabilization. Video stabilization helps reduce shakiness and enhances the stability of your videos, resulting in smoother footage.
To change these settings, simply navigate to the camera settings menu, locate the specific options, and make the desired adjustments. Experimenting with these settings can greatly enhance the overall quality and impact of your video recordings.
Deciding on the Best Resolution
Highlighting elements that influence the choice of resolution
When deciding on the best video resolution for your iPhone 15, there are several elements that you should consider:
- Storage capabilities: Assess the amount of available storage space on your device. Higher resolutions require more storage, so ensure that you have enough space to accommodate your chosen resolution.
- Desired video quality: Consider the level of detail you want to capture in your videos. Higher resolutions offer sharper and more detailed footage. If you prioritize high-quality video content, a higher resolution may be suitable.
- Device performance: Higher resolutions may require more processing power, which can impact the overall performance of your device. If you experience lag or other performance issues while recording videos, opting for a lower resolution may be preferable.
By taking these elements into account, you can make an informed decision on the best video resolution for your specific needs.
Weighing professional versus personal needs for resolution
The choice of video resolution can vary depending on whether you have professional or personal needs. For professional videographers or individuals producing high-quality content, higher resolutions, such as 4K, may be preferred. These resolutions provide exceptional detail and are well-suited for professional-grade videos.
For personal or casual videos, lower resolutions, such as 1080p, may be more suitable. These resolutions still offer satisfactory quality while saving storage space, which can be valuable for everyday recording needs.
Consider your intended use for the videos and the level of quality required for your specific purposes. By weighing professional versus personal needs, you can make an informed decision on the resolution that best suits your requirements.
Advising on resolution choices based on storage capabilities
Considering your storage capabilities is essential when choosing the video resolution for your iPhone 15. Higher resolutions, such as 4K, require significantly more storage space compared to lower resolutions. If you have limited storage space on your device, it is advisable to opt for lower resolutions, such as 1080p, to ensure that you have enough storage available for your videos.
However, if storage space is not a concern and you prioritize high-quality video content, higher resolutions may be the preferred choice. These resolutions offer exceptional detail and are well-suited for professional or high-quality videos.
By aligning your resolution choices with your storage capabilities, you can optimize your video recording experience while ensuring that you have sufficient storage space for your videos.
Implementing Changes and Running the New Settings
Steps on finalizing changes in settings
After making adjustments to your video recording settings, it is important to finalize the changes to ensure they are applied to your future recordings. To finalize changes in the settings:
- Exit the camera settings menu by tapping the appropriate icon or using the designated back button.
- Ensure that your changes in settings are saved before exiting the settings menu.
- Open the camera app again and confirm that the updated settings are reflected in the camera interface.
By following these steps, you can ensure that your new video recording settings are applied and ready for use.
Hitting the ‘Record’ button: transitioning from settings to actual recording
Once you have finalized your changes in settings, it’s time to put them into action by transitioning from the settings menu to the actual recording process. Simply locate the record button within the camera interface and tap on it to start recording. Ensure that you position your device appropriately and frame your shot as desired before hitting the record button.
By seamlessly transitioning from the settings menu to the recording process, you can make the most out of your customized video recording settings.
Testing out the new settings by making a sample recording
To ensure that your new settings are effectively applied and meet your desired outcome, it is advisable to make a sample recording. This allows you to assess the video quality, resolution, and other settings to ensure they align with your preferences and needs.
Simply record a short video using the newly adjusted settings and review the footage afterward. Pay attention to the level of detail, smoothness of motion, and overall video quality. If the sample recording meets your expectations, you can confidently proceed with using the new settings for your future recordings.
Conclusion
In conclusion, understanding and customizing the video recording resolution on your iPhone 15 can greatly enhance your video recording capabilities. By familiarizing yourself with the camera settings menu, choosing the most suitable video type, selecting the appropriate video resolution, and making adjustments to other related settings, you can tailor your video recording experience to meet your specific preferences and needs.
Mastering the navigation to the camera settings and becoming well-acquainted with the camera app allows for more efficient adjustments and optimal utilization of the iPhone 15’s video recording capabilities. By experimenting with different settings, exploring various options, and testing out the new settings through sample recordings, you can continually improve the quality and impact of your video recordings.
The iPhone 15 offers a wide range of video recording capabilities that enable you to capture videos with exceptional detail and visual quality. By maximizing the video recording resolution and other settings, you can make the most out of your iPhone 15 and create impressive videos that capture the essence of the moment.
Remember to always assess your storage capabilities, consider your intended use for the videos, and make informed choices based on your preferences and needs. By understanding and implementing the changes in video recording resolution, you can unlock the full potential of your iPhone 15 and take your video recording skills to new heights.