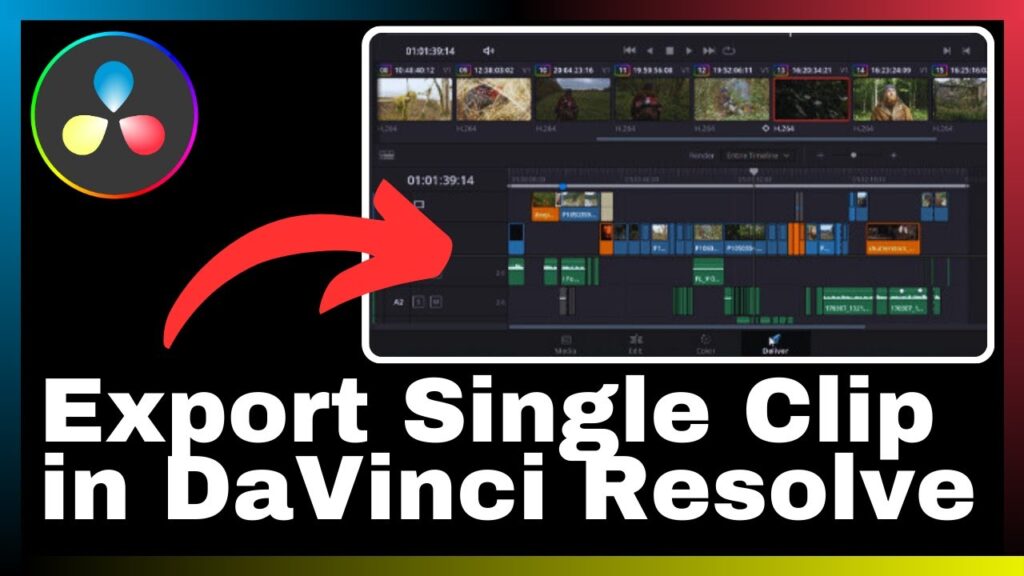
In “How to Export Single Clip in DaVinci Resolve,” the video by Media Magnet Guide, you will gain valuable insights on effectively exporting individual video clips using DaVinci Resolve software. This tutorial aims to help you understand the process of exporting single clips for specific purposes or sharing. DaVinci Resolve is an all-in-one video editing, color correction, visual effects, and audio post-production software that offers a comprehensive set of tools suitable for both professionals and beginners. By following this tutorial, you will be equipped with the knowledge to utilize DaVinci Resolve’s features for exporting single video clips efficiently and with ease. Remember to stay tuned for more DaVinci Resolve tutorials and tips to enhance your video editing skills.
Understanding DaVinci Resolve
DaVinci Resolve is a powerful software that combines video editing, color correction, visual effects, and audio post-production capabilities in one comprehensive package. It offers a wide range of tools and features suitable for both professionals and beginners, making it a popular choice for projects of all sizes and complexities. Whether you’re looking to edit and enhance your videos or create stunning visual effects, DaVinci Resolve provides the necessary tools to bring your vision to life.
About DaVinci Resolve
DaVinci Resolve is an all-in-one video editing software developed by Blackmagic Design. It is known for its advanced color grading capabilities and is widely used in the film and television industry. The software has gained popularity due to its user-friendly interface and powerful features, making it accessible to both professionals and beginners.
Features of DaVinci Resolve
DaVinci Resolve offers an extensive list of features that allow users to edit, color correct, apply visual effects, and enhance the audio in their videos. Some of the key features include:
-
Advanced Color Grading: DaVinci Resolve provides powerful color grading tools, allowing users to manipulate the colors and tones of their footage with precision.
-
Video Editing: The software offers a robust set of editing tools, including timeline editing, trimming, transitions, and audio synchronization.
-
Visual Effects: DaVinci Resolve includes a wide range of visual effects and compositing tools, enabling users to create stunning and realistic effects in their videos.
-
Audio Post-Production: With its built-in audio editing and mixing tools, DaVinci Resolve allows users to enhance the audio quality of their videos, add sound effects, and mix multiple audio tracks.
-
Collaboration and Workflow: DaVinci Resolve offers collaborative features that enable multiple users to work on a project simultaneously, streamlining the editing and post-production process.
Getting Started with DaVinci Resolve
Before diving into the world of DaVinci Resolve, it is important to ensure that your system meets the minimum requirements for running the software smoothly. Here are the system requirements for DaVinci Resolve:
- Operating System: Windows 10, macOS Mojave 10.14.6 or later, or CentOS/RHEL 7.3 or later
- Processor: Intel Core i7 or AMD Ryzen 7 or higher
- RAM: 16GB or higher
- Graphics Card: NVIDIA GeForce RTX 2060 or AMD Radeon RX 5700 or higher
- Storage: SSD with at least 256GB of free space
Once you have verified that your system meets the requirements, you can proceed with the installation process. To install DaVinci Resolve, follow these steps:
- Download the installer from the official website of Blackmagic Design.
- Run the installer and follow the on-screen instructions to complete the installation.
- Launch DaVinci Resolve once the installation is complete.
After installing DaVinci Resolve, it is essential to set up the software to suit your specific needs and preferences. Here are some steps to help you get started with the setup:
- Set your project resolution and frame rate by creating a new project or modifying the settings of an existing project.
- Configure the media storage locations to specify where DaVinci Resolve should look for and save media files.
- Customize the user interface by rearranging panels, adjusting workspace layouts, and adding shortcuts for frequently used tools.
By following these setup steps, you can tailor DaVinci Resolve to your workflow and maximize your efficiency while using the software.
Importing Clips in DaVinci Resolve
Importing clips into DaVinci Resolve is a straightforward process. To import clips, follow these steps:
- Open DaVinci Resolve and navigate to the Media page.
- Click on the Import Media button or use the shortcut Ctrl+I to open the import window.
- Browse and select the clips you want to import from your computer’s file system.
- Click the Import Selected button to import the clips into your project.
Once imported, the clips will appear in the media pool on the left side of the interface. DaVinci Resolve provides various options for organizing and managing your media files. You can create bins and folders to categorize your clips, add metadata to facilitate search and organization, and even create smart bins that automatically sort your clips based on specific criteria.
The media page in DaVinci Resolve offers a comprehensive set of tools for managing and organizing your media files, making it easy to locate and work with your footage during the editing process.

Navigating the Interface of DaVinci Resolve
The interface of DaVinci Resolve may appear overwhelming at first, but with some understanding of its key components, you can navigate it effectively. Here’s an overview of the key elements of the DaVinci Resolve interface:
-
Menus and Toolbars: Located at the top of the interface, the menus and toolbars provide access to various commands and functions within DaVinci Resolve.
-
Viewer: The viewer is where you can preview and analyze your clips. It allows you to play, scrub, and mark in and out points to select specific portions of your footage.
-
Media Pool: The media pool contains all the imported clips and media files. It provides quick access to your footage and allows you to organize and manage your media files efficiently.
-
Timeline: The timeline is where you arrange and edit your clips to create your final video. You can add, trim, and arrange clips, and apply effects and transitions to achieve your desired result.
-
Inspector: The inspector panel provides detailed information and controls for the currently selected clip or element. It allows you to adjust various properties, apply effects, and modify parameters.
Understanding these key elements of the interface will help you navigate DaVinci Resolve with ease and efficiency, enabling you to focus on the creative aspects of your project.
Selecting a Single Clip for Export
Before exporting a single clip in DaVinci Resolve, you need to select the specific clip you want to export from your timeline. To select a clip in the timeline, follow these steps:
- Open the timeline containing your clips.
- Click on the clip you want to export to select it. You can also click and drag to select multiple clips if needed.
- Once the clip is selected, you can adjust its properties, such as duration, position, and scale, using the controls in the inspector panel.
By selecting the desired clip in the timeline, you can isolate it for further adjustments and prepare it for export.
Adjusting Clip Properties
After selecting a clip in DaVinci Resolve, you have the option to adjust its properties according to your specific requirements. The inspector panel provides various controls for modifying clip properties. Here are some properties that you can adjust:
-
Duration: You can specify the duration of the clip by changing its in and out points in the timeline.
-
Position: The position property allows you to adjust the placement of the clip within the frame. You can move it horizontally or vertically to achieve the desired composition.
-
Scale: The scale property controls the size of the clip. You can increase or decrease the scale to zoom in or out of the clip.
-
Rotation: If you need to rotate the clip, you can use the rotation property to achieve the desired angle.
-
Opacity: The opacity property controls the transparency of the clip. You can adjust it to create various effects, such as fades or overlays.
By adjusting these properties, you can fine-tune the selected clip to match your creative vision and requirements.
Previewing the Clip Before Export
Before exporting the selected clip, it is essential to preview it to ensure that all adjustments and modifications have been applied correctly. DaVinci Resolve provides multiple options for previewing your clip before exporting. Here’s how you can preview the clip:
-
In the viewer, click on the Play button to start the playback of the clip. You can use the controls in the viewer to pause, resume, or scrub through the clip.
-
If necessary, use the in and out points in the timeline to limit the preview to a specific portion of the clip.
-
While previewing, observe the clip closely to ensure that the selected properties and adjustments are working as intended.
By thoroughly previewing the clip, you can identify any potential issues or areas that require further modifications before proceeding with the export process.
Setting up Export Parameters in DaVinci
After selecting and adjusting the clip, it’s time to set up the export parameters in DaVinci Resolve. Export parameters determine the format, quality, and settings of the exported clip. Here are the key steps to set up export parameters:
-
At the top of the interface, click on the Deliver page to access the export settings.
-
Choose the destination where you want to save the exported clip. You can select a specific folder on your computer or an external storage device.
-
Next, select the export format for the clip. DaVinci Resolve offers a wide range of formats, including common video formats like MP4 and MOV.
-
Adjust the export settings to match your requirements. You can modify parameters such as resolution, frame rate, bitrate, and codec.
Setting up the export parameters correctly is crucial to ensure that the exported clip meets your desired specifications and compatibility needs.
Going through the Export Process
Once you have set up the export parameters in DaVinci Resolve, you can start the export process to generate the final exported clip. Here’s how to go through the export process:
-
Review the export settings to ensure that they align with your requirements. Double-check the destination, format, and settings before proceeding.
-
Click on the Start Render button to initiate the export process. DaVinci Resolve will begin rendering the clip and generating the exported file.
-
Monitor the export progress in the progress bar or status indicator provided by DaVinci Resolve. The time taken for the export process will depend on the length and complexity of the clip.
-
Once the export process is complete, DaVinci Resolve will notify you. Navigate to the specified destination folder to locate the exported clip.
During the export process, it is essential to keep an eye on any error messages or issues that may arise. Troubleshooting any export problems promptly will ensure that you obtain a high-quality exported clip without any issues.
Understanding Exported File Formats and their Uses
DaVinci Resolve offers a wide range of file formats for exporting your clips. It is crucial to understand the different types of file formats and their uses to select the most appropriate format for your specific requirements. Here’s an overview of the common file formats and their uses:
-
MP4 (H.264): This is a widely used and highly compatible video file format. It is suitable for sharing videos on social media platforms, uploading to video-sharing websites, or playing on various devices.
-
MOV: This file format is commonly used in the Apple ecosystem and is compatible with Apple devices and applications. It is useful for sharing videos within the Apple ecosystem or working with Mac-specific software.
-
ProRes: ProRes is a professional-quality video codec developed by Apple. It offers high-quality video compression with minimal loss, making it ideal for broadcast and high-quality video productions.
-
DNxHD/DNxHR: These file formats are specifically designed for Avid editing systems. They provide efficient and high-quality video compression, making them suitable for Avid workflows.
-
AVI: AVI is a common video file format supported by various media players and editing software. It is suitable for compatibility with older systems or specific software requirements.
When choosing an exported file format, consider factors such as compatibility, quality, file size, and the intended use of the clip. By selecting the appropriate format, you can ensure that your exported clip is effectively utilized in its intended context.
Sharing the Exported Clips
Once you have exported the clip successfully, you may need to share it with others or distribute it across different platforms. Here are some common methods for sharing the exported clips:
-
Email or File Transfer: You can share the exported clip by attaching it to an email or using file transfer services like Dropbox or Google Drive. This method is suitable for sharing with individuals or small groups.
-
Social Media or Cloud Storage: If you intend to share the clip on social media platforms or cloud storage services like YouTube or Vimeo, you can upload the exported clip directly from DaVinci Resolve. The software provides integrations and presets for seamless sharing.
-
Protecting Your Clips: To protect your exported clips during sharing, consider using encryption or watermarking techniques. Encryption ensures that only authorized individuals can access the clip, while watermarking adds a visible or invisible mark to deter unauthorized use.
By employing these sharing methods, you can distribute your exported clips efficiently and ensure that they reach the intended audience or platform securely.
Conclusion
Exporting a single clip in DaVinci Resolve is a fundamental process that allows you to share your video content effectively or prepare it for further post-production. By following the steps outlined in this guide, you can understand the process of exporting single clips in DaVinci Resolve and utilize the software effectively for your specific needs.
DaVinci Resolve’s comprehensive set of tools and features provides immense creative possibilities for video editing, color grading, visual effects, and audio post-production. As you become more proficient with the software, you can explore its advanced features to further enhance your videos and bring your creative vision to life.
Remember to experiment, practice, and continue learning about the various aspects of DaVinci Resolve. With dedication and a deep understanding of the software, you can become a proficient user and create compelling and professional-quality videos.


