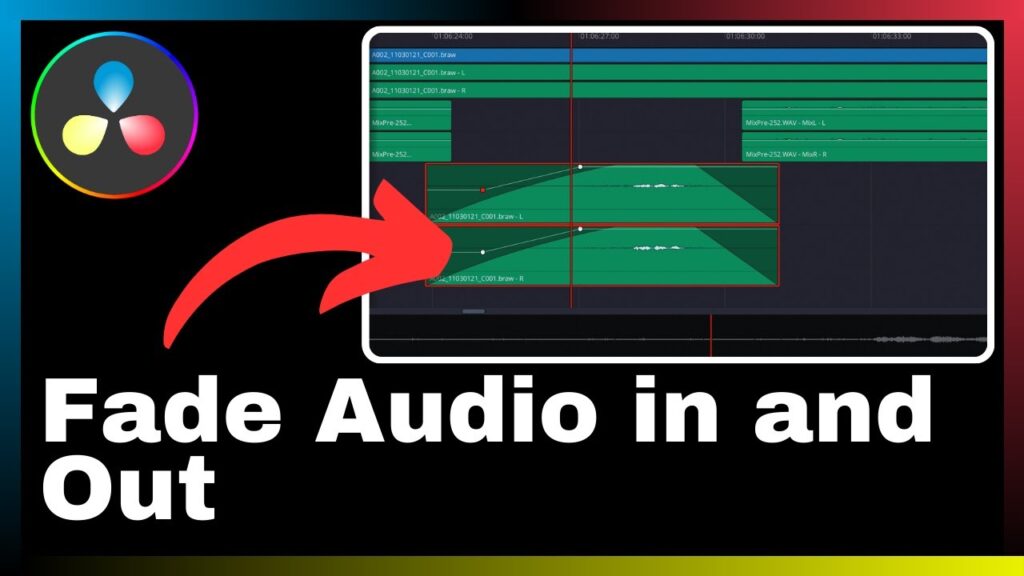
In the realm of video editing, smooth transitions are essential for creating a cohesive and polished final product. In this article, titled “How to Fade Audio in and Out in DaVinci Resolve,” you will learn valuable techniques to achieve gradual audio fade-ins and fade-outs using the DaVinci Resolve software. Presented by Media Magnet Guide, this informative video will guide you through the step-by-step process, allowing you to enhance the audio quality of your videos and create a more professional and engaging viewing experience. Whether you are a seasoned professional or a beginner in the field of video editing, the comprehensive set of tools in DaVinci Resolve makes it an ideal choice for projects of all sizes and complexities. So, get ready to unleash your creativity and master the art of audio fading in DaVinci Resolve for seamless and captivating transitions in your videos.
Understanding DaVinci Resolve
About DaVinci Resolve
DaVinci Resolve is a comprehensive video editing, color correction, visual effects, and audio post-production software. It offers a wide range of professional-level tools and features that make it a popular choice for both beginners and experienced professionals in the filmmaking industry.
DaVinci Resolve’s Feature Set
DaVinci Resolve comes with a rich feature set that includes advanced color grading capabilities, powerful video editing tools, a robust audio editing system, and integration with other software applications. It allows users to have complete control over every aspect of their video production, from the initial editing to the final touch-ups.
Importance of Audio Editing in DaVinci Resolve
While video editing is essential for creating visually appealing content, audio editing plays an equally important role in delivering a high-quality viewing experience. Audio editing in DaVinci Resolve allows users to enhance the sound quality, remove unwanted background noise, adjust audio levels, and create smooth and seamless transitions between audio clips.
Getting Started with DaVinci Resolve
Downloading and Installing DaVinci Resolve
To begin working with DaVinci Resolve, you first need to download and install the software on your computer. Visit the official Blackmagic Design website, navigate to the DaVinci Resolve page, and follow the instructions to download the software. Once the download is complete, run the installer and follow the on-screen prompts to install DaVinci Resolve.
Basic Navigation and User Interface
After installing DaVinci Resolve, launch the software to explore its user interface. The interface consists of various panels and windows that allow you to access different features and tools. Familiarizing yourself with the basic navigation and layout of DaVinci Resolve will help you navigate through the software efficiently and make the most out of its capabilities.
Intro to Audio Editing in DaVinci Resolve
Introduction to Fairlight Workspace in DaVinci Resolve
The Fairlight workspace in DaVinci Resolve is specifically designed for audio editing. It provides a dedicated environment for manipulating and enhancing audio tracks. By switching to the Fairlight workspace, you can access advanced audio editing tools, mix multiple audio tracks, apply audio effects, and perform precise audio adjustments.
Understanding the Audio Timeline and Tracks
The audio timeline in DaVinci Resolve allows you to view and manipulate audio clips. It consists of multiple tracks, where each track represents a separate audio element. Understanding how the audio timeline and tracks work is crucial for organizing your audio clips, arranging them in the desired sequence, and applying various audio editing techniques.
Key Audio Editing Tools and Features in DaVinci Resolve
DaVinci Resolve offers a range of powerful audio editing tools and features that help you achieve professional-level audio results. Some of the key tools include volume adjustment, equalization, noise reduction, pitch correction, and audio panning. Familiarizing yourself with these tools and features will enable you to take full control of your audio editing process.
The Concept of Audio Fading
What is Audio Fading
Audio fading refers to the gradual increase or decrease in the volume of an audio clip over time. It is a technique used to create smooth transitions between audio clips, prevent abrupt changes in audio intensity, and improve the overall listening experience. Audio fading can be applied at the beginning (fade in) or end (fade out) of an audio clip or at specific points within the clip.
When to Use Audio Fades
Audio fades are commonly used in various scenarios to enhance the storytelling or artistic elements of a video. They are particularly useful when transitioning between different scenes, introducing or concluding a dialogue, fading music in or out, or creating a gradual change in the mood or atmosphere of a video. Knowing when and how to use audio fades can greatly impact the quality and effectiveness of your video production.
Importance of Audio Fades
Audio fades play a significant role in creating a professional and polished audio experience. They help in smoothing out abrupt changes in volume, reducing distractions caused by sudden audio shifts, and maintaining the viewer’s immersion in the content. By utilizing audio fades effectively, you can ensure that your audio tracks blend seamlessly together, creating a cohesive and immersive audio experience for your audience.
Setting Up for Audio Fading
Navigating to the Fairlight Workspace
To begin applying audio fades, switch to the Fairlight workspace in DaVinci Resolve. This workspace provides a range of dedicated tools and features specifically designed for audio editing. By navigating to the Fairlight workspace, you can access the necessary tools and functions required for applying fades to your audio clips.
Selecting an Audio Clip for Fading
Once you are in the Fairlight workspace, select the audio clip you want to apply the fade to. This can be done by clicking on the audio clip in the timeline or by selecting it from the media pool. By selecting the desired audio clip, you can focus your editing efforts on that specific clip and apply the fade with precision.

Inspecting Audio Clip in the Mixer
Before applying the fade, it is essential to inspect the audio clip in the mixer to understand its current properties and settings. The mixer provides an overview of the clip’s volume levels, pan settings, and other audio parameters. By inspecting the audio clip in the mixer, you can make informed decisions regarding the fade settings and adjustments required for the desired effect.
Performing a Fade In
Adding a Fade In
To perform a fade in, position the playhead at the beginning of the audio clip where you want the fade to start. Locate the fade in controls in the Fairlight toolbar, and click on the appropriate button to add the fade in effect. This will gradually increase the volume of the audio clip from silence to the desired level.
Adjusting the Duration of the Fade In
The duration of the fade in effect can be adjusted to control the speed at which the volume increases. DaVinci Resolve provides options to set the duration manually or adjust it using predefined templates. Experiment with different durations to find the one that suits your audio clip and desired effect.
Previewing the Fade In Effect
After adding and adjusting the fade in effect, preview the result to evaluate its impact on the audio clip. Playback the audio clip from the beginning and observe the gradual increase in volume. This allows you to ensure that the fade in effect is applied correctly and achieves the desired audio transition.
Performing a Fade Out
Applying the Fade Out Effect
To perform a fade out, position the playhead at the end of the audio clip where you want the fade to start. Locate the fade out controls in the Fairlight toolbar, and click on the appropriate button to add the fade out effect. This will gradually decrease the volume of the audio clip from the current level to silence.
Modifying the Fade Out Duration
Similar to the fade in effect, the duration of the fade out effect can be modified to control the speed at which the volume decreases. Adjust the duration according to the desired effect and the length of your audio clip. Experiment with different durations to find the optimal fade out duration for your specific audio clip.
Checking the Fade Out Effect
After applying and adjusting the fade out effect, play back the audio clip to ensure that the fade out effect achieves the desired audio transition. Observe the gradual decrease in volume as the clip reaches its end. If necessary, make further adjustments to the fade out duration to achieve the desired effect.
Advanced Fading Techniques
Bending Audio Fades
In addition to the basic fade in and fade out effects, DaVinci Resolve allows you to bend the shape of audio fades. This means you can customize the fade curve to create unique and dynamic transitions. By experimenting with different fade curve shapes, you can add a personalized touch to your audio edits and make them stand out.
Custom Audio Fade Curves
DaVinci Resolve provides the option to create custom audio fade curves, allowing you to have precise control over the shape and timing of the fades. This feature is especially useful when you want to create complex audio transitions or match audio fades to specific visual elements in your video. Experiment with different curve shapes to achieve your desired audio effect.
Using the Automate Fade In and Out Function
To save time and streamline your audio editing workflow, DaVinci Resolve offers an automate fade in and out function. This feature automatically applies fade in and fade out effects to selected audio clips based on predefined settings. By using this function, you can quickly apply fades to multiple clips simultaneously, reducing manual effort and ensuring consistency across your audio tracks.
Troubleshooting Common Issues
Fixing Failures in Audio Fading
Sometimes, you may encounter issues while applying audio fades in DaVinci Resolve. These can range from unexpected volume changes, audio glitching, or inaccurately timed fades. To fix such issues, ensure that you have selected the correct fade controls, adjust the fade durations and settings, and review your audio clip properties for any conflicting settings.
Dealing with Synchronization Issues
Occasionally, audio fades may cause synchronization issues with your video footage. This can result in audio lagging or leading the visual elements, creating an undesirable viewing experience. To address synchronization issues, review the timeline markers, adjust the positioning of the fade in or out points, and ensure that the audio and video tracks are correctly aligned.
Solving Disappearing Fade Handles Problems
In some cases, fade handles may appear to be missing or not accessible for adjustment. This can make it challenging to apply or modify audio fades accurately. To solve this problem, check whether the audio clip is properly selected, inspect the timeline configuration to ensure that fade handles are enabled, and verify that there are no overlapping clips or conflicting settings.
Conclusion
Recap on How to Fade Audio In and Out Using DaVinci Resolve
In this article, we explored the concept of audio fading and its importance in video production. We discussed the process of setting up DaVinci Resolve for audio fading, applying fade in and fade out effects, and adjusting the duration and shape of the fades. Additionally, we explored advanced fading techniques, troubleshooting common issues, and the significance of audio fades in creating a professional audio experience.
Further Resources for Mastering DaVinci Resolve
If you want to dive deeper into audio editing and mastering DaVinci Resolve, there are various resources available that provide comprehensive tutorials, tips, and techniques. Explore online tutorials, official documentation, forums, and video courses to enhance your skills and maximize your productivity with DaVinci Resolve.
Encouraging Practice and Experimentation
Mastering audio fading in DaVinci Resolve requires practice and experimentation. By dedicating time to practice and exploring different techniques, you can develop a better understanding of the software’s capabilities and how to use them effectively. Embrace experimentation and challenge yourself to explore new creative possibilities with audio fading in DaVinci Resolve.


