In “How to Import Video in DaVinci Resolve,” Media Magnet Guide provides a comprehensive tutorial on efficiently importing video files into DaVinci Resolve for seamless editing and production. DaVinci Resolve is an integrated software that encompasses video editing, color correction, visual effects, and audio post-production tools, catering to both professionals and beginners. This tutorial aims to equip users with the necessary skills to effectively import video files, making it a popular choice for projects of any size or complexity. With step-by-step instructions, viewers will gain valuable insights on maximizing the potential of DaVinci Resolve for their video editing needs.
How to Import Video in DaVinci Resolve

Understanding the DaVinci Resolve Interface
The DaVinci Resolve interface is designed to streamline your video editing and production workflow. It provides a comprehensive set of tools for professionals and beginners alike. Familiarizing yourself with the interface is essential to effectively import and edit video files.
Overview of the interface
The DaVinci Resolve interface is divided into several sections, each serving a specific purpose. The timeline panel allows you to arrange and edit your video clips, while the media pool panel provides access to your imported videos. The toolbar at the top of the interface contains various tools and functions, such as trimming, transitions, and effects. On the left side of the interface, you’ll find the inspector panel, which allows you to make specific adjustments to your selected clips.
Navigating through the interface
You can navigate through the DaVinci Resolve interface using various methods. The timeline zoom slider allows you to adjust the zoom level of your timeline, making it easier to view and edit your clips. You can also use the scroll wheel on your mouse to scroll horizontally or vertically through the timeline. To navigate between panels, simply click on the desired panel tab at the bottom of the interface.
Commonly used tools and their functions
DaVinci Resolve offers a wide range of tools to enhance your video editing process. The trimming tool allows you to precisely trim your clips, while the transitions tool enables you to add seamless transitions between clips. Additionally, the effects tool provides a variety of visual effects, such as color grading and image stabilization. Familiarize yourself with these tools to make the most of your video editing experience in DaVinci Resolve.
Preparing for Video Import
Before importing video files into DaVinci Resolve, it is important to properly prepare your workflow to ensure a smooth editing process.
Organizing your workflow
Organizing your video files in a structured manner can greatly improve your editing workflow. Prior to importing, create a dedicated folder for your project and subfolders for different types of media, such as videos, images, and audio files. This organization will make it easier to locate and manage your media files throughout the editing process.
Creating a new project
To create a new project in DaVinci Resolve, go to the File menu and select “New Project.” Give your project a name and specify the location where you want to save it. You can also customize project settings, such as resolution, frame rate, and audio format, to match the specifications of your video files.
Setting the project’s parameters
It is important to set the project’s parameters correctly to ensure compatibility with your video files. Go to the Project Settings tab and adjust the settings according to your video’s resolution, frame rate, and aspect ratio. This will prevent any potential issues during the import and editing process.
Selecting the Right Import Method
DaVinci Resolve offers various import options to cater to different preferences and needs. Understanding the import methods can help you choose the most suitable one for your project.
Understanding the various import options
There are three main import options in DaVinci Resolve: importing through the File menu, importing through drag and drop, and importing through the Media Pool. Importing through the File menu allows you to browse your computer’s directories and select the files you want to import. Drag and drop enables you to simply drag the video files from your computer and drop them directly into the DaVinci Resolve interface. Importing through the Media Pool allows you to import videos from specific folders or directly from a camera or storage device.
Choosing the appropriate import method for your project
The import method you choose depends on your personal preferences and the nature of your project. If you prefer a more organized approach, importing through the File menu or the Media Pool may be ideal. On the other hand, if you prefer a more intuitive and quick method, drag and drop can save you time and effort. Consider the specific requirements of your project and choose the import method that suits your needs best.
How to Import Video Files
Importing video files into DaVinci Resolve is a fundamental step in the editing process. Understanding the different import methods can help you efficiently import your video files.
Importing through File menu
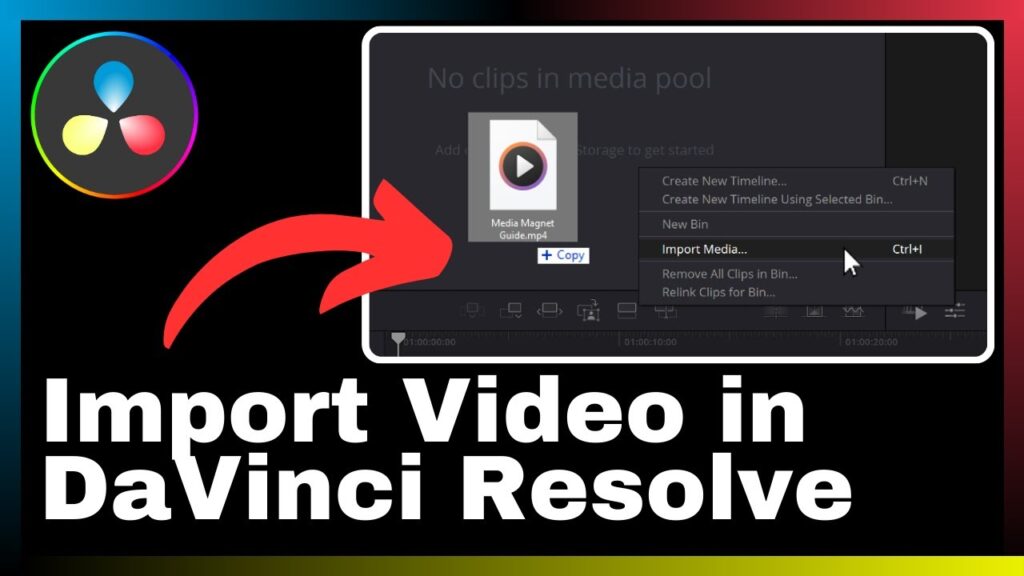
To import video files through the File menu, click on “File” and select “Import Media.” This will open a browser window where you can navigate to the location of your video files. Select the desired video files and click “Import.” The selected files will then appear in the Media Pool panel for further organization and editing.
Importing through drag and drop
Importing video files through drag and drop is a quick and efficient method. Simply locate the video files on your computer and drag them onto the DaVinci Resolve interface. Position the files in the desired location within the Media Pool panel, and they will be automatically imported.
Importing through Media Pool
To import video files through the Media Pool, click on the Media Pool tab in the toolbar. This will open the Media Pool panel, where you can either create a new bin or select an existing one to import your videos into. Right-click on the selected bin and choose import to open a browser window. Navigate to the location of your video files, select them, and click “Open.” The selected video files will be imported into the chosen bin.
Importing Different Video Formats
DaVinci Resolve supports a wide range of video formats, ensuring compatibility with various types of video files. Understanding how to import different video formats can help you work with diverse media assets.
Importing MP4 files
MP4 is a commonly used video format that is widely supported by DaVinci Resolve. To import MP4 files, follow the standard import methods mentioned earlier. Simply select the desired MP4 files and import them using your preferred method.
Importing MOV files
MOV is another popular video format that is compatible with DaVinci Resolve. The import process for MOV files is similar to that of MP4 files. Locate the MOV files on your computer and import them using your preferred import method.
Importing AVI files
AVI is a video format commonly used in Windows-based systems. To import AVI files into DaVinci Resolve, ensure that the necessary codecs are installed on your computer. Follow the standard import methods to import AVI files into your project.
Importing MKV files
MKV is a video format that is not natively supported by DaVinci Resolve. However, you can use video conversion tools to convert MKV files into a compatible format, such as MP4 or MOV, before importing them into DaVinci Resolve. Once the files are converted, you can proceed with the standard import methods.
Dealing with Incompatible Video Formats
There may be instances where you encounter incompatible video formats that cannot be directly imported into DaVinci Resolve. However, there are solutions available to address this issue.
Identifying incompatible video formats
Incompatible video formats are typically those that are not supported by DaVinci Resolve or lack the required codecs for playback. When attempting to import such files, you may receive error messages or encounter difficulties playing them back within the software.
Using video conversion tools
To overcome incompatible video formats, you can use video conversion tools to convert the files into a compatible format. There are several third-party software options available that allow you to convert video formats. Simply select the desired video files, choose the appropriate output format (such as MP4 or MOV), and initiate the conversion process. Once the files have been converted, you can import them into DaVinci Resolve for editing without any compatibility issues.
Managing Imported Videos
Once you have successfully imported your videos into DaVinci Resolve, it is important to effectively manage and organize them for efficient editing and production.
Organizing video clips in the Media Pool
The Media Pool panel serves as a central location for managing your imported videos. To effectively organize your video clips, create bins within the Media Pool panel. Bins act as folders that allow you to group related video clips together. By organizing your videos into specific bins based on categories, themes, or scenes, you can easily locate and access them during the editing process.
Creating bins for better management
To create a new bin in the Media Pool panel, right-click in the desired location and select “Create New Bin.” Give the bin a descriptive name and move the relevant video clips into the bin. This categorization will ensure that your videos are neatly organized and easily accessible as you work on your project.
Renaming and finding clips
Renaming your imported video clips can further enhance your management process. To rename a video clip, right-click on it in the Media Pool panel and select “Rename.” Provide a descriptive and easily recognizable name that accurately represents the content of the clip. This will make it easier to search and locate specific clips within your project.
Troubleshooting Import Issues
Importing video files into DaVinci Resolve may occasionally come with its own set of issues. It is important to troubleshoot any import errors that may arise to ensure a smooth editing experience.
Resolving common import errors
Some common import errors include unsupported video formats, missing codecs, or corrupt video files. If you encounter an unsupported video format, refer back to the section on dealing with incompatible video formats. If you receive an error indicating missing codecs, install the necessary codec pack on your computer. In the case of corrupt video files, verify that the original files are intact and try reimporting them into DaVinci Resolve.
Optimizing system settings for better performance
Import issues may also be caused by system settings that are not optimized for video editing. Ensure that your computer meets the minimum system requirements for DaVinci Resolve and that your graphics drivers are up to date. Adjust your system settings to allocate sufficient resources for video editing, such as increasing RAM allocation or adjusting power settings to prioritize performance over energy saving.
Editing Imported Videos
Once you have successfully imported your videos into DaVinci Resolve, you can begin the editing process. DaVinci Resolve offers a range of basic and advanced editing tools and techniques to enhance your videos.
Basic editing tools and techniques
Basic editing tools in DaVinci Resolve include trimming, splitting, and rearranging video clips on the timeline. Use the trim tool to precisely cut and adjust the length of your video clips. Splitting clips allows you to separate a single clip into multiple segments for editing purposes. Rearrange clips on the timeline to create the desired sequence and flow of your video.
Advanced editing techniques
DaVinci Resolve also offers advanced editing techniques such as color grading, transitions, and visual effects. Use the color grading tools to enhance the overall look and feel of your videos. Experiment with different transitions to create smooth and seamless transitions between clips. Apply visual effects to add stylized elements or fix imperfections in your videos. Explore the various advanced editing techniques available to suit your creative vision.
Conclusion
Importing video files into DaVinci Resolve is an essential step in the video editing process. Understanding the interface, organizing your workflow, and selecting the appropriate import methods can greatly enhance your editing experience. By effectively managing your imported videos, troubleshooting any import issues, and utilizing the editing tools and techniques offered in DaVinci Resolve, you can achieve seamless and professional-quality video editing results.
Recap of how to import video in DaVinci Resolve
To import video files into DaVinci Resolve, you can use the File menu, drag and drop, or the Media Pool. Choose the most suitable method based on your preferences and project requirements.
Tips for efficient video importing and editing
- Organize your video files in a structured manner to streamline your workflow.
- Create a new project and set the project’s parameters correctly to ensure compatibility with your video files.
- Convert incompatible video formats before importing them into DaVinci Resolve.
- Use bins and renaming to effectively manage and locate your imported video clips.
- Troubleshoot any import issues that may arise, such as unsupported formats or missing codecs.
- Optimize your system settings for better performance during importing and editing.
Further resources for mastering DaVinci Resolve
To further enhance your skills in DaVinci Resolve, consider exploring additional tutorials, online forums, and official documentation provided by Blackmagic Design, the creators of DaVinci Resolve. These resources can help you delve deeper into the software’s capabilities and master advanced editing techniques.


