In the article titled “How To Resize Images In Canva,” you will learn the step-by-step process of resizing and optimizing images using Canva. The video, created by Media Magnet Guide, provides a comprehensive tutorial on this topic.
The tutorial begins by instructing you to open the Canva image editor and navigate to the elements tab on the left-hand side of your screen. From there, you can choose any photo you wish to add to your Canva project. The tutorial guides you through the process of manipulating the image’s size using control points and dragging techniques. Additionally, it explains how to set the image as a background and provides tips for more precise control over image dimensions. Whether you are new to Canva or looking to enhance your image resizing skills, this tutorial is a valuable resource for optimizing your Canva projects.
Understanding Canva’s Image Editor
Introduction to Canva’s Image Editor
Canva’s Image Editor is a powerful tool that allows you to resize and optimize images for various platforms. Whether you’re working on a social media graphic, a blog post header, or a presentation slide, Canva’s Image Editor provides the functionalities and features you need to create visually stunning designs. In this article, we will explore the main features and functionalities of Canva’s Image Editor, as well as provide a step-by-step guide on how to resize images using this tool.
Understanding the main features and functionalities of Canva’s Image Editor
Canva’s Image Editor offers a wide range of features and functionalities to help you resize and optimize your images. Some of the key features include control points, the ability to set an image as a background, precise control over image dimensions, the use of templates for resizing, and the option to take advantage of Canva’s 30-day free trial. These features and functionalities make it easy for users to resize their images to their desired specifications and create visually appealing designs.
Overview of Canva’s menus and toolbars
When you open Canva’s Image Editor, you will come across various menus and toolbars that provide you with access to different features and functionalities. The main menus include File, Edit, View, Image, and Help. These menus allow you to perform actions such as opening and saving files, editing images, adjusting the view of your canvas, and accessing help resources. Additionally, Canva’s toolbars consist of options such as Undo/Redo, Zoom, Guides, Grids, and Snap to Grid, which can enhance your editing experience and help you align and resize your images accurately.
Opening Canva’s Image Editor
Steps to open Canva’s Image Editor
To begin using Canva’s Image Editor, you first need to open the editor. Start by launching Canva on your device and signing in to your account. Once you have signed in, navigate to the Image Editor section, which can usually be found in the main menu or toolbar. Click on the Image Editor option to open the editor. Once the editor is open, you will be ready to start resizing your images.
Navigating through Canva’s Image Editor
After opening Canva’s Image Editor, you will notice a user-friendly interface that allows for effortless navigation. The editor provides a canvas where you can view and make changes to your images, as well as various options and menus on the left-hand side of the screen. These options and menus allow you to choose and add images to your project, access different editing features, and customize your design. Familiarize yourself with the layout and navigation of the editor to make the resizing process smoother.
Accessing different features of the Image Editor
Canva’s Image Editor offers a range of features that can enhance your image resizing experience. To access these features, navigate to the appropriate menus and toolbars on the editor’s interface. For example, to resize an image using control points, select the image and locate the control points that appear around the image. To set an image as the background, right-click on the image and choose the “Set Image as Background” option. Explore the different menus and options in the Image Editor to discover all the available features and make the most out of your resizing process.
Selecting an Image for Resizing
Going through the gallery of photos
Once you have opened Canva’s Image Editor, you will have the option to choose an image for resizing. To do this, click on the “Elements” tab on the left-hand side of the screen. This will open a gallery of photos that you can browse through and select from. Take your time to explore the gallery and find the image that best suits your project.
How to select a particular image
In the gallery of photos, you will find a wide variety of images to choose from. To select a particular image for resizing, simply click on the image you want to use. Once you click on the image, it will be added to your canvas, and you can proceed with the resizing process.
Adding the image to your project
After selecting the desired image, it will be automatically added to your project’s canvas. You can now see the image on your canvas and proceed to resize it according to your preferences. Remember that you can always change or replace the image later if needed, so feel free to experiment with different images until you find the perfect fit for your project.
Overview of Control Points
Understanding the role of control points
Control points are essential tools in Canva’s Image Editor that allow you to manually adjust the size of your images. They serve as reference points that you can click and drag to resize the image to your desired dimensions. By manipulating these control points, you have the flexibility to customize the image size based on the specific requirements of your project.
Locating the control points on the image
When you add an image to your canvas, you will notice a series of dots scattered around it. These dots represent the control points. They are strategically placed at different corners and edges of the image, allowing for precise resizing. To access and use these control points, simply click on them and drag them inwards or outwards to adjust the image size accordingly.
Using control points to adjust the size of images manually
To resize an image using control points, start by selecting the image on the canvas. Once selected, the control points will become visible. Click and drag any of these control points to resize the image. By dragging the control points closer together, you can make the image smaller. Conversely, dragging them further apart will increase the size of the image. Experiment with different combinations of control point movements until you achieve the desired image dimensions.
Setting Image as Background
Steps to set an image as a background in the project
If you decide to set an image as the background of your project, follow these steps:
- Select the image that you want to set as the background by clicking on it.
- Right-click on the image to access the context menu.
- From the context menu, choose the “Set Image as Background” option.

Understanding the implications of setting an image as background
When you set an image as the background of your project, it becomes an integral part of the design. The image will serve as the foundation, with other elements and content being placed on top of it. This can have implications on the overall layout and composition of your project, as well as affect any further resizing or manipulation of the background image.
How to detach an image from the background
If you have set an image as the background but wish to detach it to regain the ability to manually resize the image using control points, follow these steps:
- Select the image that is currently set as the background.
- Right-click on the image to access the context menu.
- From the context menu, choose the “Detach Image from Background” option.
Once you have detached the image from the background, you will be able to resize it using control points again. This gives you more flexibility in adjusting the image size to your preferences.
Precise Control over Image Dimensions
Locating the resize feature on the Canva interface
To gain precise control over the dimensions of your image, locate the resize feature on the Canva interface. This feature is typically located in the upper left corner of the interface, often represented by an icon with arrow symbols pointing in opposite directions.
Entering custom width and height values for the image
Once you have located the resize feature, click on it to open a dialogue box. In this dialogue box, you can enter custom width and height values for your image. This allows you to be specific about how large or small you want your image to be, ensuring precise control over the dimensions.
Choosing between using pixels or the metric system measurements
When entering custom width and height values for your image, Canva provides the option to choose between using pixels or the metric system measurements. Pixels are commonly used for digital designs, while metric system measurements are more suitable for print projects. Select the measurement unit that aligns with your specific requirements to accurately resize your image accordingly.
Using Canva’s Templates for Resizing
Introduction to Canva’s predefined size templates
Canva offers a vast collection of predefined size templates that can be used to resize your images. These templates provide you with a starting point, ensuring that your image dimensions are already set according to popular and commonly used dimensions for specific platforms or project types. Using templates can save you time and effort, as you won’t have to manually adjust the dimensions for each project.
How to use templates for resizing images
To use a template for resizing an image, follow these steps:
- Open Canva’s Image Editor.
- Browse through the template library, which is usually accessible from the left-hand side of the screen.
- Select the desired template that matches your project requirements and dimensions.
- After selecting the template, you can add your image to the template and resize it accordingly. The template will serve as a guideline or frame to ensure that your resized image fits perfectly within the predefined dimensions.
Understanding the requirement of a premium account to access some templates
While many templates in Canva’s library are available for free, some templates may require a premium account for access. Premium templates often offer more advanced features and customization options, making them suitable for professional designs. If you encounter a template that requires a premium account and you do not have one, consider taking advantage of Canva’s 30-day free trial to access these templates and explore the full range of features Canva has to offer.
Taking Advantage of Canva’s 30-Day Free Trial
Information about Canva’s 30-day free trial
Canva offers a 30-day free trial for users who wish to explore and experience the full capabilities of the platform. With the free trial, you gain access to premium features, templates, and resources that can elevate your design projects. This trial period allows you to test out Canva’s paid offerings and decide if they align with your design needs and preferences.
Benefits of using Canva’s 30-day free trial
By taking advantage of Canva’s 30-day free trial, you can enjoy several benefits. These include:
- Access to premium features: During the trial period, you can explore and utilize premium features that are typically only available to paid subscribers. This allows you to experience Canva’s full potential and make informed decisions about upgrading your account.
- Utilization of premium templates: The free trial gives you access to a wide range of premium templates, which can enhance your resizing process and provide you with professional-quality designs.
- Increased design options: With the free trial, you can broaden your design horizons by accessing additional resources, such as premium images, fonts, and illustrations. This expands your creative possibilities and allows you to create unique and compelling resized images.
How to access and use Canva’s 30-day free trial
To access Canva’s 30-day free trial, follow these steps:
- Visit Canva’s website and sign up for an account if you haven’t already.
- Look for the option to start a free trial, usually located on the homepage or in the account settings section.
- Follow the prompts to initiate the free trial period.
- Once the trial is activated, explore Canva’s premium features and templates to make the most of your resizing and design projects.
Finalizing the Resize Process
Steps to finalize the resizing process
After you have resized your image to your desired dimensions, there are a few steps you can take to finalize the process:
- Preview your resized image: Take a moment to preview your resized image to ensure that it meets your expectations. Review the composition, layout, and overall visual impact of the resized image.
- Make any necessary adjustments: If you notice any areas that require further resizing or fine-tuning, utilize the control points or other resizing features in Canva’s Image Editor to make the necessary adjustments.
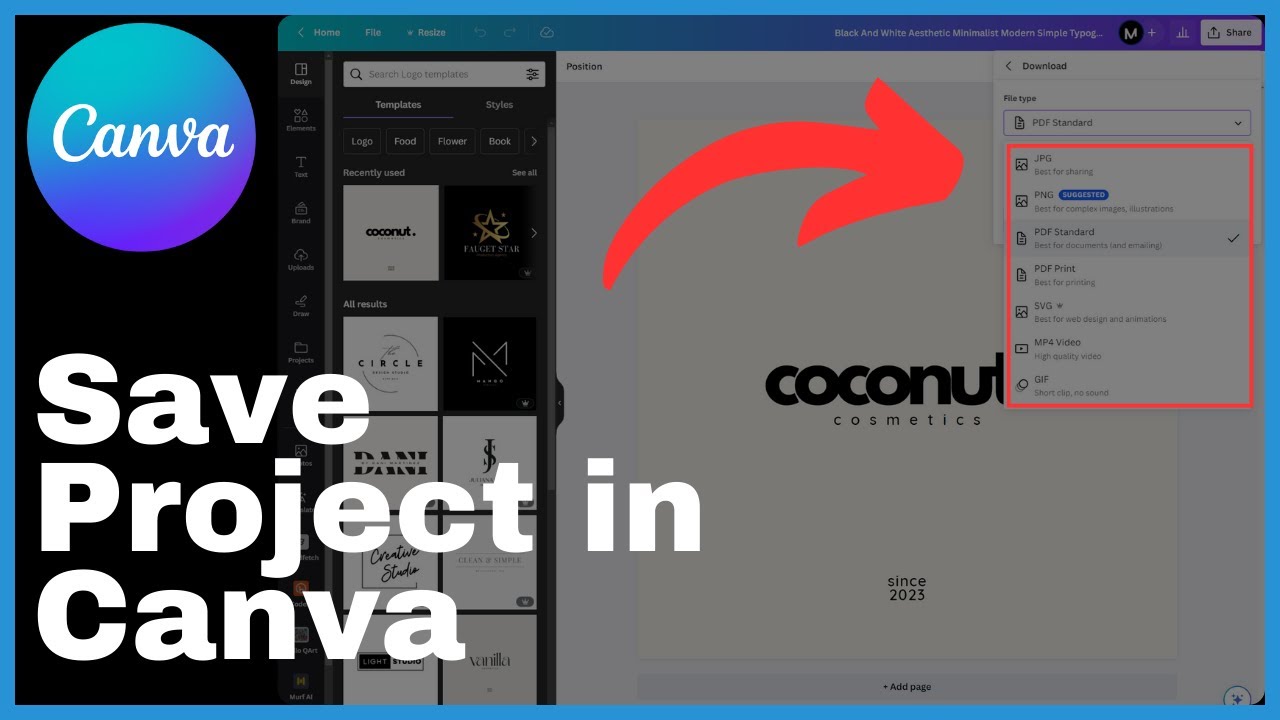
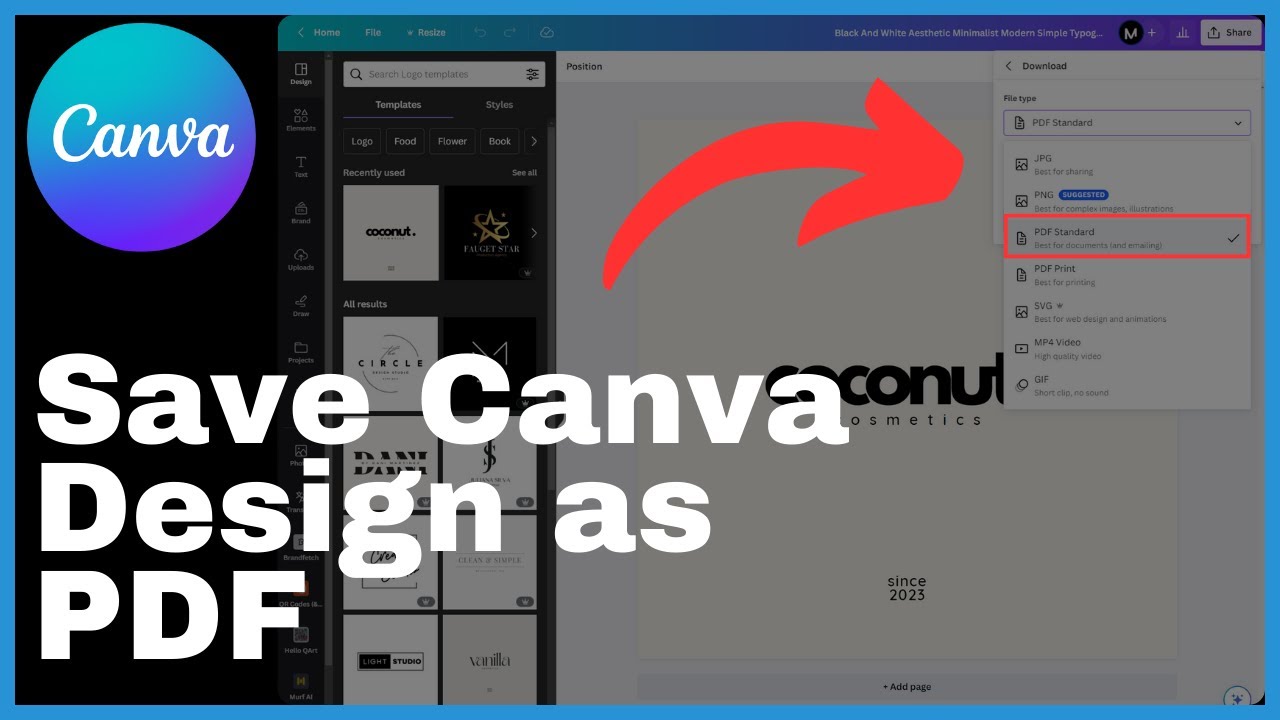
- Save your project: Once you are satisfied with the resized image, save your project to preserve your work. Canva provides various saving options, including saving to your device, saving to the Canva cloud, and exporting the project in different file formats.
- Export your project: If you plan to use the resized image in a specific platform or medium, consider exporting the project in a format that is compatible with that platform. Canva offers a range of file formats suitable for different purposes, such as JPEG, PNG, or PDF.
Checking the resized image
Before finalizing the resizing process, it is crucial to carefully examine your resized image. Check for any distortions, pixelation, or loss of quality that may have occurred during the resizing process. Make sure that the image retains its clarity, sharpness, and overall visual appeal even after being resized.
Saving and exporting your project
Once you have reviewed and confirmed the quality of your resized image, it’s time to save and export your project. Save your project to ensure that you can access and make further modifications if needed. Additionally, export your project in the desired file format and follow any platform-specific guidelines for optimal image display and compatibility.
Conclusion
Recapping the process of resizing images in Canva
In this comprehensive guide, we have explored Canva’s Image Editor and its capabilities for resizing images. We covered the main features and functionalities of Canva’s Image Editor, such as control points, setting images as backgrounds, precise control over image dimensions, and the use of templates. We also discussed how Canva’s 30-day free trial can be beneficial for users looking to explore premium features and resources. Finally, we provided steps for finalizing the resizing process and emphasized the importance of continuous practice and exploration of Canva’s features.
Pointing out other possible functionalities not covered
While this guide covered the essentials of resizing images in Canva, it’s important to note that the platform offers numerous other functionalities that can enhance your design projects. Canva provides various tools for editing, enhancing, and customizing your images, such as filters, effects, text overlays, and more. Exploring these additional functionalities can further elevate your resized images and expand your creative possibilities.
Encouraging continuous practice and exploration of Canva’s features
To truly master the art of resizing images in Canva, it is essential to practice and explore the platform’s features continuously. Experiment with different techniques, try out new templates and designs, and challenge yourself to push the boundaries of your creativity. Canva’s intuitive interface and extensive resources make it an ideal platform for honing your resizing skills and creating visually captivating designs. So, embrace the endless possibilities offered by Canva and embark on a journey of continuous learning and improvement.