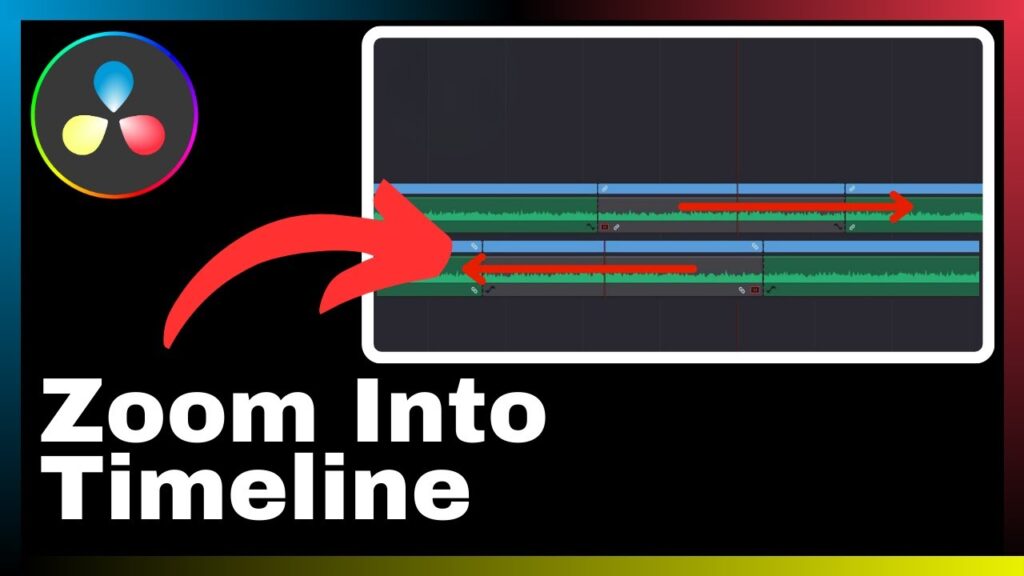
In this informative article titled “How to Zoom Into Timeline in DaVinci Resolve,” you will gain valuable insights on effectively zooming into the timeline within DaVinci Resolve for precise editing and timeline navigation. The article is presented by Media Magnet Guide, providing expert guidance and practical tips to enhance your video editing skills. DaVinci Resolve is an all-in-one video editing, color correction, visual effects, and audio post-production software that offers a comprehensive set of tools suitable for professionals and beginners alike. This article aims to equip you with the necessary knowledge to utilize the zoom function in DaVinci Resolve efficiently, allowing you to enhance your editing capabilities and streamline your workflow.
Please note that the content provided in this article is meant for educational purposes only and is based on individual research. The article does not promote any illegal activities or intend to give financial advice. It is essential to recognize that the content on external websites and services is not the responsibility of the author or Media Magnet Guide.
Understanding DaVinci Resolve Basics
Understanding the DaVinci Resolve interface
DaVinci Resolve is a powerful video editing software that offers a wide range of tools for professionals and beginners. To effectively use this software, it is important to have a good understanding of its interface. The interface of DaVinci Resolve is designed to provide users with a seamless editing experience. It consists of various panels and windows that can be customized to suit individual preferences. These panels include the Media pool, Edit page, Color page, Fusion page, Fairlight page, and Deliver page. Each panel serves a specific purpose and allows users to perform various tasks related to video editing, color correction, visual effects, and audio post-production.
Knowing the different components of DaVinci Resolve
DaVinci Resolve is comprised of several components that work together to provide users with a comprehensive video editing experience. These components include the timeline, viewer, toolbar, inspector, and media pool. The timeline is where users can assemble and arrange their video clips, audio tracks, and effects. The viewer is where users can preview their edits and make adjustments as needed. The toolbar provides access to various editing tools and functions, such as cutting, trimming, and adding transitions. The inspector allows users to modify the properties of individual clips and apply effects. The media pool is where users can import and organize their media files.
Understanding the role of DaVinci Resolve in video editing
DaVinci Resolve plays a crucial role in the process of video editing. It provides users with a wide range of tools and features that help them to enhance their videos and create professional-grade productions. Some of the key features of DaVinci Resolve include advanced color grading capabilities, support for high-resolution and RAW footage, real-time collaboration, multi-camera editing, and seamless integration with other post-production tools. By using DaVinci Resolve, video editors can have more control over their projects and achieve the desired results.
Recognizing the Importance of Zooming into the Timeline
Appreciating the need for precision in video editing
Video editing requires a high level of precision and attention to detail. Every cut, transition, and effect must be placed in the right position with the right timing to create a cohesive and visually appealing final product. Zooming into the timeline allows editors to get a closer look at the individual frames and make precise adjustments. This level of precision is essential for maintaining the integrity of the footage and achieving the desired visual impact.
How zooming in on the timeline can aid in fine editing
When editing a video, zooming in on the timeline enables editors to see the finer details of each frame. This can be particularly useful when working with complex shots or intricate transitions. By zooming in, editors can accurately trim and position clips, adjust the timing of effects, and ensure smooth transitions between scenes. This level of fine editing is crucial for creating seamless and polished videos.
Effect of timeline zooming on video output quality
Zooming in on the timeline does not affect the quality of the final video output. The zoom function in DaVinci Resolve only adjusts the level of magnification for editing purposes. The original footage remains unchanged, and any adjustments made during the editing process will only be applied when the final video is rendered. Therefore, editors can zoom in as much as necessary to achieve the desired precision without compromising the quality of the output.
Navigating the Timeline in DaVinci Resolve
Identifying different parts of the DaVinci Resolve timeline
The timeline in DaVinci Resolve consists of various elements that allow for efficient and precise video editing. These elements include the playhead, clips, transitions, audio tracks, keyframes, and markers. The playhead is a movable indicator that shows the current position of the timeline. Clips are the individual video and audio segments that make up the project. Transitions are used to create smooth visual effects between clips. Audio tracks allow for the placement and adjustment of audio elements. Keyframes are used to control the properties of clips and apply changes over time. Markers are used to identify specific points or sections in the timeline for reference.
Understanding the chronological flow of the timeline
The timeline in DaVinci Resolve follows a chronological flow from left to right. It represents the sequence of events in the video and audio tracks over time. Editors can arrange clips and apply effects in a specific order on the timeline to create a cohesive narrative or visual structure. By understanding the chronological flow of the timeline, editors can effectively organize their project and make adjustments accordingly.
Learning how to navigate through different parts of the timeline
To navigate through different parts of the timeline in DaVinci Resolve, editors can use various techniques and tools. They can click and drag the timeline view to scroll horizontally and view different sections. They can also use the zoom tool to zoom in or out of the timeline to get a closer or wider view of the content. Additionally, keyboard shortcuts can be used to navigate to specific points or sections in the timeline, allowing for efficient editing and precise adjustments.

The Concept of Zooming into the Timeline
Defining zoom in DaVinci Resolve
Zoom in DaVinci Resolve refers to the act of magnifying the view of the timeline to get a closer look at the individual frames or sections. It allows editors to see more details and make precise adjustments to their edits. Zooming in can be done vertically to focus on a specific track or horizontally to focus on a specific time range. By zooming in, editors can have a better understanding of the overall composition of their project and ensure the accuracy of their edits.
Understanding the zoom effect on the timeline
The zoom effect in DaVinci Resolve is not an actual visual effect but rather a functionality that allows editors to change the level of magnification on the timeline. When zooming in, the timeline becomes larger, showing more details and allowing for precise editing. Conversely, when zooming out, the timeline becomes smaller, showing a wider view of the content and enabling editors to have a better overview of the project. The zoom effect can be adjusted to fit the specific needs and requirements of the editing process.
Why zoom is an important tool in DaVinci Resolve
Zoom is an important tool in DaVinci Resolve because it enables editors to have a closer look at the individual frames and sections of the timeline. This level of magnification is crucial for making accurate adjustments, especially when working with complex shots, intricate transitions, or detailed visual effects. By using the zoom tool, editors can ensure the precision and quality of their edits, resulting in a more polished and visually appealing final product.
Steps to Zoom Into the Timeline in DaVinci Resolve
Identifying the zoom tool in DaVinci Resolve
The zoom tool in DaVinci Resolve is located in the toolbar at the bottom of the interface. It is represented by a magnifying glass icon. By clicking on the zoom tool, editors can activate the zoom functionality and adjust the level of magnification on the timeline.
Step by step guide to zooming into the timeline
- Open your project in DaVinci Resolve and navigate to the timeline view.
- Locate the zoom tool in the toolbar at the bottom of the interface.
- Click on the zoom tool to activate the zoom functionality.
- To zoom in, click and drag your mouse cursor over the desired area of the timeline. The area will be magnified, showing more details.
- To zoom out, click and drag your mouse cursor away from the area of the timeline. The area will become smaller, showing a wider view of the content.
- Adjust the level of magnification as needed by repeating steps 4 and 5.
- To reset the zoom, double-click on the timeline view or use the keyboard shortcut for zoom reset.
Verifying the zoom level on the timeline in DaVinci Resolve
To verify the zoom level on the timeline in DaVinci Resolve, editors can refer to the toolbar at the bottom of the interface. The zoom level is displayed next to the zoom tool. It indicates the current level of magnification on the timeline. By checking the zoom level, editors can ensure that they are zoomed in or out to the desired level and make adjustments accordingly.
Using Keyboard Shortcuts for Zooming into the Timeline
Identifying the keyboard shortcuts for zooming
DaVinci Resolve provides several keyboard shortcuts for zooming into the timeline. These shortcuts allow editors to quickly adjust the level of magnification without the need to click on the zoom tool. The keyboard shortcuts for zooming in and out vary depending on the operating system. In general, the keyboard shortcut for zooming in is the plus (+) key, and the keyboard shortcut for zooming out is the minus (-) key.
Understanding the benefits of using keyboard shortcuts
Using keyboard shortcuts for zooming into the timeline offers several benefits. Firstly, it allows for faster and more efficient editing as editors can quickly make adjustments without the need to navigate through the interface. Secondly, it reduces the risk of accidentally clicking the wrong tool or button when using the mouse. Keyboard shortcuts also promote a more ergonomic editing workflow by minimizing repetitive mouse movements and strain on the hand and wrist.
Practicing using keyboard shortcuts for zooming
To practice using keyboard shortcuts for zooming into the timeline in DaVinci Resolve, editors can open a project and follow these steps:
- Navigate to the timeline view.
- Press the plus (+) key on the keyboard to zoom in.
- Press the minus (-) key on the keyboard to zoom out.
- Repeat steps 2 and 3 to adjust the level of magnification as desired.
- Verify the zoom level on the timeline to ensure the desired level of magnification has been achieved. By practicing these keyboard shortcuts, editors can become more proficient in using them and enhance their editing efficiency.
Tips and Tricks for Effective Zooming in DaVinci Resolve
Learning from experts: Best practices for zooming into the timeline
To improve your zooming skills in DaVinci Resolve, it can be helpful to learn from experts and follow their best practices. Here are some tips:
- Use zoom sparingly: While zooming can be a useful tool, it’s important to use it judiciously. Only zoom in when necessary to make precise adjustments and avoid excessive zooming that may lead to cluttered visualizations.
- Combine zoom with other editing techniques: Zooming into the timeline should be used in conjunction with other editing techniques to achieve the best results. Experiment with trimming, cutting, and applying effects alongside zooming to create a cohesive and visually appealing final product.
- Optimize your workflow: Continuously look for ways to optimize your workflow when zooming into the timeline. Assign keyboard shortcuts to frequently used zoom functions, customize the interface layout to have the zoom tool easily accessible, and streamline your editing process to minimize the time spent on zooming in and out.
- Seek inspiration from others: Watch tutorials or study the works of experienced editors to gain inspiration and learn different approaches to zooming into the timeline. This can provide valuable insights and help you improve your own editing techniques.
Avoiding common mistakes when zooming into the timeline
When zooming into the timeline in DaVinci Resolve, there are some common mistakes that editors should avoid. These include:
- Overzooming: It’s important to strike a balance when zooming into the timeline. Avoid overzooming, which can lead to pixelation and loss of visual clarity. Assess the level of magnification needed for a specific adjustment and zoom accordingly.
- Neglecting the overall composition: While focusing on the finer details through zooming, make sure to periodically zoom out and assess the overall composition of the video. This helps maintain the coherence of the project and ensures that individual edits fit within the larger context.
- Forgetting to reset the zoom: After making adjustments or fine edits, it’s important to reset the zoom to its default level. Forgetting to reset the zoom can lead to confusion and affect subsequent editing tasks.
- Ignoring keyboard shortcuts: Take advantage of keyboard shortcuts for zooming in and out. Neglecting keyboard shortcuts can slow down the editing process and hinder productivity.
Experimenting with the zoom tool for different effects
The zoom tool in DaVinci Resolve can also be used creatively to achieve various visual effects. By combining zooming with other editing techniques, such as keyframing and animation, editors can create dynamic and engaging sequences. Experiment with zooming in or out during transitions, use zoom to emphasize specific elements or moments, and apply gradual zooms for smooth and seamless effects. By exploring the capabilities of the zoom tool, editors can add depth and visual interest to their videos.
Troubleshooting Common Problems with Zooming in DaVinci Resolve
How to fix the zoom tool when it doesn’t work as expected
If the zoom tool in DaVinci Resolve is not working as expected, there are a few troubleshooting steps you can take to resolve the issue:
- Check for updates: Make sure you are using the latest version of DaVinci Resolve. Updates often include bug fixes and improvements that can address issues with the zoom tool.
- Restart the software: Quit DaVinci Resolve and relaunch it. This can help resolve any temporary glitches or conflicts that might be affecting the zoom functionality.
- Reset preferences: In some cases, corrupted preferences can cause problems with the zoom tool. Resetting the preferences to their default settings can help resolve these issues. Consult the DaVinci Resolve documentation or support resources for instructions on how to reset preferences.
- Reinstall DaVinci Resolve: If all else fails, you can try reinstalling DaVinci Resolve. Ensure that you have a backup of your projects before uninstalling the software.
What to do when the zoom level is stuck
If the zoom level in DaVinci Resolve seems to be stuck or unresponsive, try the following steps to resolve the issue:
- Double-click the timeline view: Sometimes, a simple double-click on the timeline view can reset the zoom level and restore normal functionality.
- Use the zoom reset keyboard shortcut: Press the appropriate keyboard shortcut for zoom reset. This will reset the zoom level to its default setting.
- Check for conflicts: Ensure that there are no conflicting keyboard shortcuts or settings that could be affecting the zoom functionality. Review the software’s preferences and settings to identify and resolve any conflicts. Consult the DaVinci Resolve documentation or support resources for more information on troubleshooting specific conflicts.
Troubleshooting tips for keyboard zoom shortcuts
If you encounter issues with the keyboard shortcuts for zooming into the timeline in DaVinci Resolve, consider the following troubleshooting tips:
- Check for conflicting shortcuts: Ensure that the keyboard shortcut you are using for zooming does not conflict with any other shortcuts in DaVinci Resolve or other software running on your computer. Adjust or customize the shortcuts as needed to avoid conflicts.
- Verify the active window: Make sure that the timeline view or the appropriate panel is active before using the keyboard shortcut. The keyboard shortcut may not work if the focus is on a different part of the interface.
- Restart the software: Quit DaVinci Resolve and relaunch it. This can help resolve any temporary glitches or conflicts that might be affecting the keyboard shortcuts.
- Restore default keyboard shortcuts: If you have customized the keyboard shortcuts, consider restoring the default settings. This can help resolve any conflicts or issues related to the custom shortcuts.
Improving Your Timeline Navigation Skills
Learning advanced timeline navigation techniques
To improve your timeline navigation skills in DaVinci Resolve, it’s important to familiarize yourself with advanced techniques. Some of these techniques include:
- JKL playback: The J, K, and L keys on the keyboard allow for efficient playback control. Pressing the J key plays the timeline in reverse, the K key pauses playback, and the L key plays the timeline forward. Combining these keys can enable precise frame-by-frame navigation.
- Markers: Utilize markers to mark important points or sections in the timeline. This makes it easier to navigate and locate specific parts of the project. Learn how to create, edit, and delete markers in DaVinci Resolve to enhance your timeline navigation skills.
- Timeline scrolling: Experiment with different methods of scrolling through the timeline. In addition to clicking and dragging the timeline view, try using scroll bars, scroll wheel, or trackpad gestures to find the method that feels most comfortable and efficient for you.
Exercises for improving timeline navigation skills in DaVinci Resolve
To improve your timeline navigation skills in DaVinci Resolve, consider incorporating the following exercises into your practice:
- Play and pause: Practice using the J, K, and L keys to control playback. Start with simple sequences and gradually increase the complexity as you become more comfortable with the controls. Focus on precision and timing when pausing playback to locate specific frames.
- Mark and locate: Create a project with multiple clips and use markers to mark important points or sections. Practice navigating to these markers quickly and accurately using keyboard shortcuts or navigation tools.
- Scrolling variations: Experiment with different methods of scrolling through the timeline. Practice using scroll bars, scroll wheel, or trackpad gestures to find the most comfortable and efficient method for your workflow. Pay attention to how each method affects your ability to navigate and locate specific sections of the timeline.
Increasing your productivity with efficient timeline navigation
Efficient timeline navigation is key to improving productivity in DaVinci Resolve. By mastering navigation techniques and becoming familiar with keyboard shortcuts, you can save time and work more efficiently. Some tips to increase your productivity include:
- Customize your keyboard shortcuts: Review the default keyboard shortcuts and customize them to fit your editing style and preferences. Assign frequently used functions and navigation commands to easily accessible keys for faster operation.
- Use the timeline overview feature: DaVinci Resolve includes a timeline overview feature that provides a visual representation of the entire timeline. Utilize this feature to quickly navigate to specific sections and gain an overview of your project’s structure.
- Practice, practice, practice: The more you practice timeline navigation in DaVinci Resolve, the more proficient you will become. Set aside dedicated practice sessions to focus solely on improving your navigation skills. This will help you internalize the techniques and develop muscle memory for efficient editing.
Conclusion
Reflecting on the importance of mastering zooming into the timeline, it is evident that this skill plays a crucial role in video editing with DaVinci Resolve. By understanding the interface, components, and role of DaVinci Resolve, editors can appreciate the significance of zooming. The ability to zoom in on the timeline allows for precise editing, aids in fine adjustments, and does not compromise video output quality.
Navigating the timeline effectively entails identifying its different parts, understanding the chronological flow, and practicing navigation techniques. Mastering the concept of zoom in DaVinci Resolve involves defining zoom, understanding its effect on the timeline, and appreciating its role as an important tool. By following the steps to zoom into the timeline, editors can utilize the zoom tool effectively and verify the zoom level.
Using keyboard shortcuts for zooming enhances editing efficiency, provided that editors identify the shortcuts, understand their benefits, and practice using them. Tips and tricks for effective zooming, along with troubleshooting common problems, equip editors with essential knowledge to optimize their zooming skills. Moreover, improving timeline navigation skills involves learning advanced techniques, practicing exercises, and increasing productivity through efficient navigation.
In conclusion, mastering zooming into the timeline in DaVinci Resolve is crucial for precise editing, fine adjustments, and overall video production quality. With continual learning and practice, editors can enhance their video editing experience and achieve professional-grade results using DaVinci Resolve.


